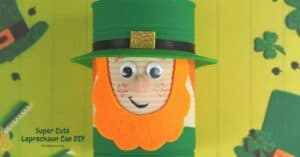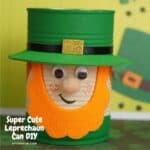
SUPER CUTE LEPRECHAUN CAN DIY,
SUPER CUTE LEPRECHAUN CAN DIY, AN EASY CRAFT PROJECT USING AN EMPTY FOOD CAN ESPECIALLY FOR ST. PATRICKS' DAY.
Yield: 1 can
Materials
Glue, scissors, glue gun and sticks, pencil, larger circle to trace for the hat brim.
Instructions
- Prepare the can by washing it out and then removing the label and any residual glue. Carefully remove any sharp edges- a can opener or file can help. Allow the can to dry.
- Paint the top ⅓rd of the can using the green paint for the hat. Use this green paint to paint the bottom ⅕th of the can for the body. It is okay to estimate these proportions or vary them as desired.When the green paint has dried you can paint the unpainted parts with the front being skin colored and the back orange for the hair. Another option is to simply paint all of the remaining can with the skin tone and when this dries simply use an orange permanent marker to to draw on the hair. Tip: use a Lazy Susan or similar rotating, protected for paint spill, to work on if needed.
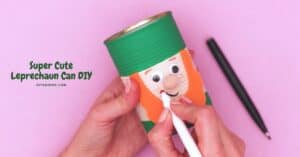
- The top green portion of the can is the hat. Using the green foam, trace the can for the inside of the brim. Then, using something that is about ¼-½" wider than the can to trace the outside of the brim before cutting the brim out. Attach the brim to the can at the base of the top green painted area.Glue the black ribbon around the hat just above the brim and then glue the golden square onto the front.Use the template that I have included to make the beard with the orange felt. Glue the beard on to the can after cutting it out. Then use the orange marker to make the freckles, eyebrows, and anything else needed.Finish the can by gluing on the pompom nose and the eyes.