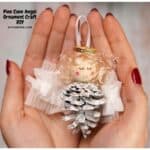
Pine Cone Angel Ornament Craft DIY
Pine Cone Angel Ornament Craft DIY, a simple holiday or Christmas craft idea for turning a pine cone into an angel.
Equipment
- pink marker and fine black marker.
- glue gun with glue sticks, a paint brush for painting, and a scissors
Materials
- Pine cone
- White Acrylic Craft Paint
- Glitter.
- Wooden Craft Ball.
- Craft (Doll) Hair.
- ribbon, tulle and lace or craft angel wings
Instructions
- Use craft paint or spray paint to paint the pine cone white. Apply a second coat as needed.While the pine cone is still wet from the final coat, sprinkle some glitter over the cone.Allow the pine cone to fully dry.
- Size up the craft hair to the wooden craft ball and trim the hair accordingly. Then glue the hair in place.
- For the halo, simply use your twist tie or pipe cleaner and to make a circle by wrapping it around your finger to the wooden ball.Glue the halo on to the hair in place. Lastly, use the markers to draw on the facial details.
- Glue the finished head on to the bottom of the pine cone, which is nowt the top of the angel.Cut two four inch pieces of ribbon.To make the wings, simply fold the tulle or lace over as if you were making a bow. Then use one of the ribbon pieces to tie it in the center.
- For the other piece of ribbon, attach the ends to the top third of the back of the angel to make a loop that can be used to hold the ornament on a branch. Then glue the wings over the ends of the ribbon to hide it.Allow the glue to set and then enjoy your adorable pine cone angel.
Notes
Visit DIYandFUN.com for details on this and other ideas.
