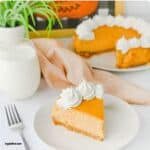
Classic creamy pumpkin cheesecake
Classic creamy pumpkin cheesecake with a buttery graham cracker crust. The perfect holiday dessert for Thanksgiving and fall celebrations! Try it now.
Servings: 10
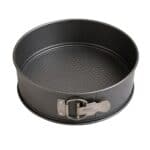
Equipment

Ingredients
Crust
- 1½ cups Graham Cracker Crumbs
- 6 tbsp Unsalted Butter --Melted and then cooled to room temperature.
- 2 tbsp Light Brown Sugar --Lightly packed.
Filling
- 24 oz Cream Cheese --Full fat cream cheese that has been softened to room temperature.
- ½ cup Sour Cream --Full fat sour cream at room temperature.
- ¾ cup Brown Sugar
- ¾ cup Granular Sugar
- 1¼ cups Pumpkin Puree --Canned pumpkin puree
- 3 Eggs
- 1½ tsp Vanilla Extract
- 2 tsp Pumpkin Pie Spice
Instructions
- Prepare. Preheat your oven to 350f. Also, line your springform pan with parchment paper.
- Crust In a medium sized mixing bowl, use a whisk or a fork to combine together the graham cracker crumbs, melted butter, and brown sugar until they resemble damp sand. Transfer the ingredients to your springform pan and press the mixture into place to form the crust. Bake the crust for 10 minutes and then allow the crust to set and cool. Bump the oven temperature down to 325 while you make the filling.
- Cream Cheese. In a large mixing bowl, beat the softened cream cheese on medium speed for one to two minutes, or until completely smooth, creamy, and free of lumps. Scrape down the sides and bottom of the bowl as needed to ensure an even texture before adding the remaining ingredients.
- Combine. Add the sour cream, along with your sugars, pumpkin puree, vanilla extract, and pumpkin pie spice to the bowl and mix on medium speed until combined (about a minute or two) than scrape down the sides of the mixing bowl.
- Eggs. Add the eggs to the mixing bowl, one at a time, mixing between additions .
- Transfer Transfer the combined ingredients to your pan with the cooled crust, evenly spread the ingredients out.
- Bake. Gently tap the bottom of the baking pan on the counter a few times and then bake the pie for 60 to 75 minutes or until the outer perimeter of the pie appears to be set and 'puffed'. The center will be slightly jiggly (which will set while the pie cools).
- Set. To help the cheesecake fully set leave it in the oven and turn off the heat. Then slightly crack the oven door open and allow the cheesecake to cool for 45 minutes. When the cheesecake has fully set you can remove it from the oven and let the cheesecake cool completely at room temperature. Once cooled you can place the pie in your refrigerator. Chill the pie uncovered for the first hour, then cover it loosely with plastic wrap or foil and refrigerate for at least 8 hours or overnight. This helps prevent excess moisture from collecting on the surface and keeps the cheesecake fresh.
Recipe Notes
*Please check the nutritional labels to assure that you are sticking to your diet restrictions for any substitutions used.
Also, please see the actual recipe post for further details on this recipe. Nutritional Information is only an estimate and can vary especially with ingredients that are used. See DiyandFun.com for details on this recipe.
Also, please see the actual recipe post for further details on this recipe. Nutritional Information is only an estimate and can vary especially with ingredients that are used. See DiyandFun.com for details on this recipe.
originally posted:
September 2, 2026*As an Amazon Associate I earn from qualifying purchases. This means that the links on this website, and specifically on this post, that lead to other sites may be affiliate links.
Nutrition
Calories: 537kcal | Carbohydrates: 50g | Protein: 7g | Fat: 35g | Saturated Fat: 20g | Polyunsaturated Fat: 2g | Monounsaturated Fat: 9g | Trans Fat: 0.3g | Cholesterol: 143mg | Sodium: 327mg | Potassium: 239mg | Fiber: 1g | Sugar: 40g | Vitamin A: 6034IU | Vitamin C: 1mg | Calcium: 124mg | Iron: 1mg
Please note: Nutritional data has been calculated using a tool that comes with this recipe card and not by me. This means that Nutritional Information is only an estimate and can vary especially with ingredients that you use. The accuracy of this tool may differ from other tools as expected. Also note that there is no instructional value to the video that may be attached to this recipe. It is only there for visual pleasure. For more information about the images in this recipe, please refer the the recipe instructions. Thank you!
Follow Me