CANDY CORN CLAY POT DIY
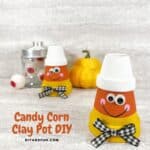
CANDY CORN CLAY POT DIY, A SIMPLE CRAFT IDEA FOR TURNING A DOLLAR STORE CLAY POT INTO A CUTE PIECES OF CANDY CORN. MOST AGES.
Materials
- 3.5” Clay Pot.
- 2.5” Clay Pot.
- Acrylic Craft Paint – White, Orange, Yellow, Pink
- Googly Eyes.
- Ribbon.
- White cardstock or cardboard..
Also, glue, glue gun, scissors, paintbrush, pencil with an eraser, black marker, circle shaped template.
Instructions
- Paint a coat of white acrylic paint to the 2.5” clay pot.Next, paint the top ⅔ of the 3.5” clay pot with orange acrylic craft paintLastly, paint the bottom ⅓ of the 3.5” clay pot with yellow acrylic craft paint.
- Using a glue gun, carefully attach the smaller white clay pot to the larger orange and yellow clay pot. Then allow the pots to set together.
- Glue two wiggle eyes on the candy corn face using a glue gun and glue sticks.To make the pink cheeks, dab a new pencil eraser in pink craft paint and then stamp it on the right and left sides, just below the eyes.
- Trace a circle onto the cardstock and then glue it over the hole on top of the candy corn (white pot).Use a marker to draw a mouth from cheek dot to cheek dot.Tie a bow in your ribbon and then glue it onto the bottom rim of the candy corn.
Notes
Visit DIYandFUN.com for details on this and other ideas.
