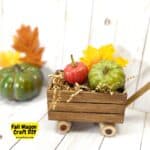
Fall Wagon Craft DIY
Fall Wagon Craft DIY, a simple and adorable do it yourself home decor project for turning a crate into a wagon. Dollar Store, Most Ages.
Yield: 1
Equipment
Materials
Instructions
- Apply a coat of paint to the outside of the crate and to one side of two of the craft sticks using the craft paint. Before the paint fully dries from the crate use a baby wipe or similar item to wipe enough of the paint to expose the grain of the wood.
- Repeat this process with the crate for a second coat. Flip the craft sticks over (when dry) and apply paint to the other sides.
- When the craft sticks are fully dry, use your ruler to measure four inches on one of the sticks and cut the excess stick off. For the second craft stick, measure and cut the stick into two, two inch, sections.
- To make the handle glue the smaller craft sticks on both sides of one end of the longer stick.
- Glue a button in the center of one end of each of the wooden stems. To attach the tires to the crate, flip the crate upside down and glue the wooden stems where tires should go (two in front, two in back, on opposite sides..).
- Flip the wagon back so that it is right side up and glue the handle in place.
- Fill the wagon as desired and enjoy!