
Fall Wagon Craft DIY is a simple and easy craft idea that is suitable for most ages.
I like that these adorable wagons can hold fall inspired items that can make about any decor look more festive for the season.

Easy fall crate craft DIY.
This craft DIY transforms basic craft crate into a cute wagon.
The wagon then can be decorated and filled with fall inspired items such as tiny pumpkins.
Did you see my Easy Slinky Pumpkin Craft DIY ?
That project takes a simple spring toy and turns it into a cute pumpkin.
Both this project for a wagon and that project for making a pumpkin are simple and inexpensive project that can be made in less than a half hour!
To make this project you will need an unfinished craft crate. You can find a selection of crates for crafts here.

Tips for making a fall crate.
Most if not all of the materials used to make this project can be found at a dollar or discount store. I will also provide you with links to purchase them online.
More tips for you
- When you purchase your materials, I would purchase extras if possible. This will make it easier to make additional wagons or work as a backup if something goes wrong.
- Acrylic craft paint was used on my crate. You can however use the paint of your choice or a stain of choice.
- While this project is suitable for most ages, some folks may need a bit of assistance as needed. This is especially true when it comes to painting or using a glue gun.
How to make a homemade craft wagon even better.
Yes, this little wagon craft is simple and cute just the way it is.
You can however make yours even better.
Try one of these ideas.
- Paint your wagon with colored paint, such a red, and use it for something other than fall (holiday season?).
- Let young ones decorate the the wagon with markers or stickers.
- Use a different sized crates rather than the small craft ones used to make my wagon.


What can you do with a craft wagon?
My craft wagon has simple dollar store decor items in it for a cute display.
These items can be easily switched out for other uses as well.
Subscribe to DIYandFun
Here are some uses for your fall wagon.
- Fill your wagon with candy and give it to someone as a gift.
- Use your wagon as a centerpiece on a table or as part of a fall display.
- Make your wagon functional to hold a plant or small pine cones.

Materials needed to make a dollar store wagon craft.
- Mini Wooden Crate. My wagon was made using a mini sized crate however, you can use the size of your choice.
- Dark Brown Acrylic Craft Paint. Actually, any color can be used however, dark brown was used to paint my wagon with.
- Unfinished wood stems. These are small round pieces of a tree branch that have been cut down. You can purchase this, cut down your own, or use something different such as wine corks to make the wheels with.
- Buttons. These are used to make the centers of the wheels. Paint or a marker would probably work if you do not have four buttons to spare.
- Craft Sticks. AKA popsicle sticks, jumbo sized, this is used to make the handle with.
- Filler items- such as craft shreds and mini pumpkins.
- Equipment needed to make this project- paint brush, scissors, glue gun with sticks, ruler, and pencil. Optional wipe for the painting process can also be used.

How to make a Fall Wagon Craft DIY
This project takes about a half hour to complete. It should make one wagon as well.
Step One: prepare.
Gather your materials and prepare your workspace. Remove and debris, packaging, or stickers from the crate, sticks, and filling materials.
Expert Tip👉 Using a small personal fan can help your paint dry faster.
Step Two: prepare the wagon materials.
- Apply a coat of paint to the outside of the crate and to one side of two of the craft sticks using the craft paint. The paint should be loosely applied.
- Before the paint fully dries from the crate use a baby wipe or similar item to wipe enough of the paint to expose the grain of the wood (if you want your crate to look like mine). Repeat this process with the crate for a second coat.
- Flip the craft sticks over (when dry) and apply paint to the other sides.
- When the craft sticks are fully dry, use your ruler to measure four inches on one of the sticks and cut the excess stick off.
- For the second craft stick, measure and cut the stick into two, two inch, sections .
Expert Tip👉 A glue gun with glue sticks were used to make my crate with. You can alternatively use a craft glue however, you will need to wait for it to dry.
Step Three: assemble the wagon.
- To make the handle glue the smaller craft stick on the end of one side of the longer sticks.
- Glue a button in the center of one end of each of the wooden stems.
- To attach the tires to the crate, flip the crate upside down and glue the wooden stems where tires should go (two in front, two in back, on opposite sides..).
- Flip the wagon back so that it is right side up and glue the handle in place. It may be easiest to slide the end without the smaller pieces of stick attached into a slat opening on the crate before glueing it in place.
- Fill the wagon as desired and enjoy it!
Expert Tip👉 Collect items from nature, such as pine cones, for an authentic fall look to put inside of your wagon.
- Spring Craft Ideas
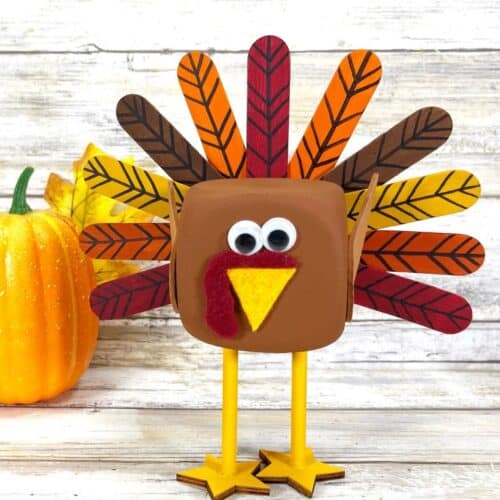
- Foam Square Turkey Craft DIY25 Minutes
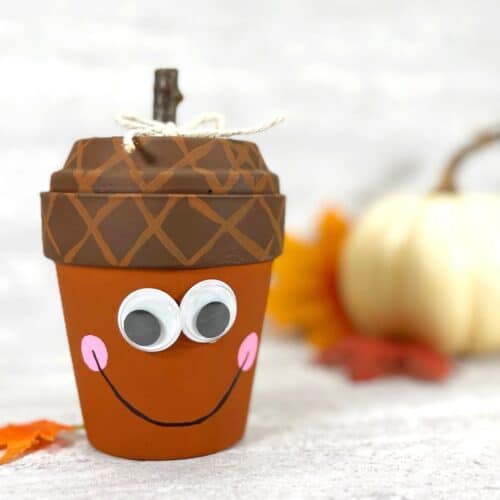
- Clay Pot Acorn Craft DIY25 Minutes
- Clay Pot Crows Craft DIY20 Minutes


In case you missed something.
Fall Wagon Craft DIY, a simple and adorable do it yourself home decor project for turing a crate into a wagon. Dollar Store, Most Ages.

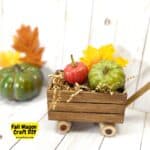
Fall Wagon Craft DIY
Equipment
Materials
Instructions
- Apply a coat of paint to the outside of the crate and to one side of two of the craft sticks using the craft paint. Before the paint fully dries from the crate use a baby wipe or similar item to wipe enough of the paint to expose the grain of the wood.
- Repeat this process with the crate for a second coat. Flip the craft sticks over (when dry) and apply paint to the other sides.
- When the craft sticks are fully dry, use your ruler to measure four inches on one of the sticks and cut the excess stick off. For the second craft stick, measure and cut the stick into two, two inch, sections.
- To make the handle glue the smaller craft sticks on both sides of one end of the longer stick.
- Glue a button in the center of one end of each of the wooden stems. To attach the tires to the crate, flip the crate upside down and glue the wooden stems where tires should go (two in front, two in back, on opposite sides..).
- Flip the wagon back so that it is right side up and glue the handle in place.
- Fill the wagon as desired and enjoy!