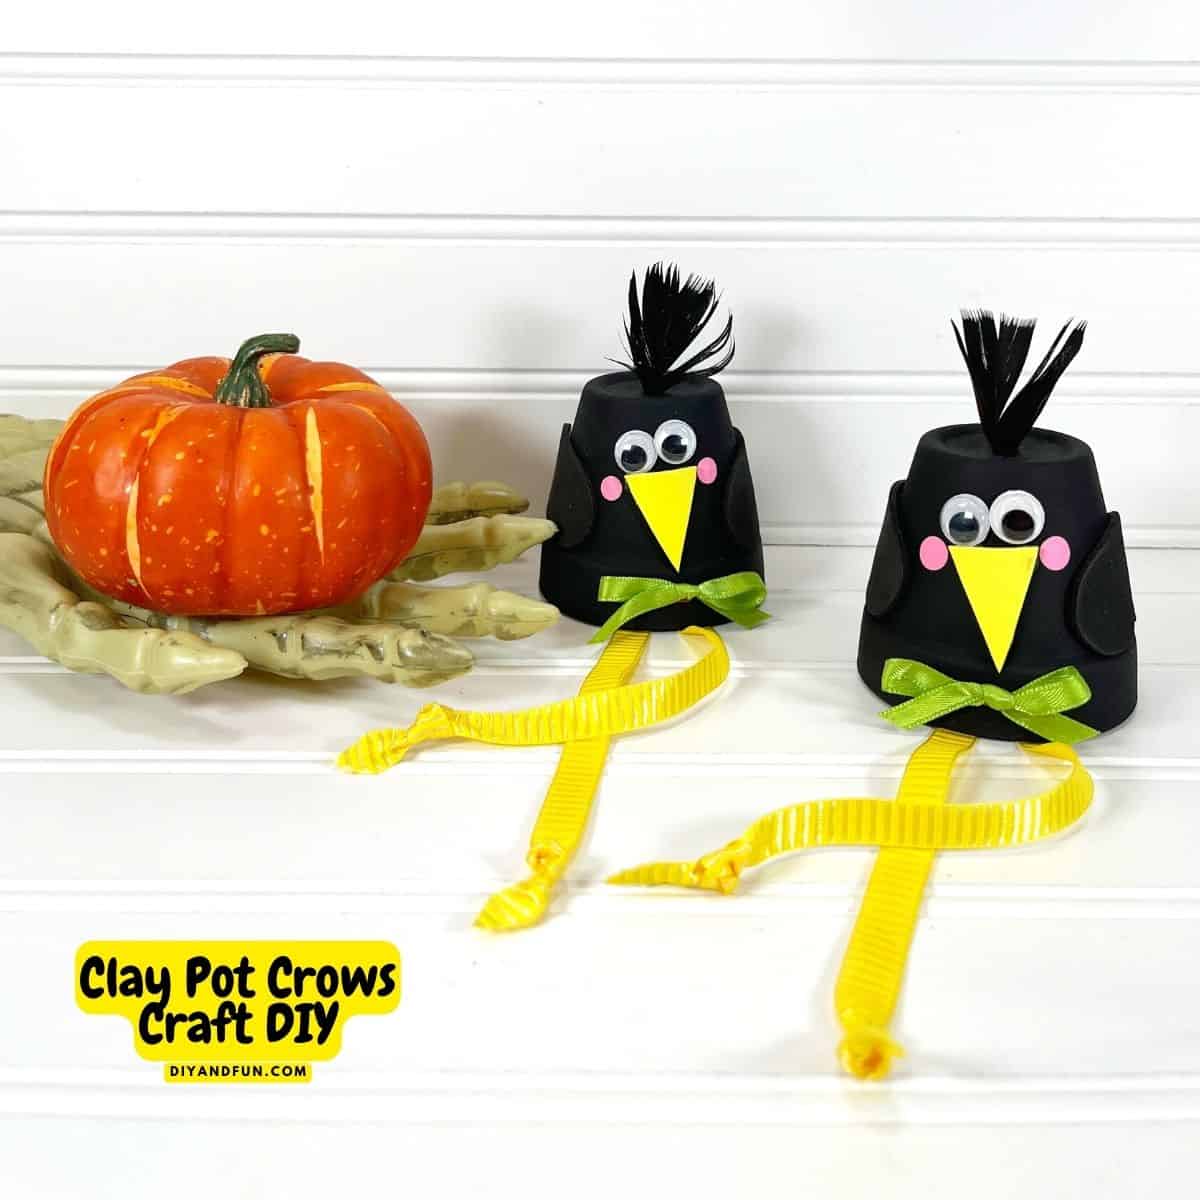
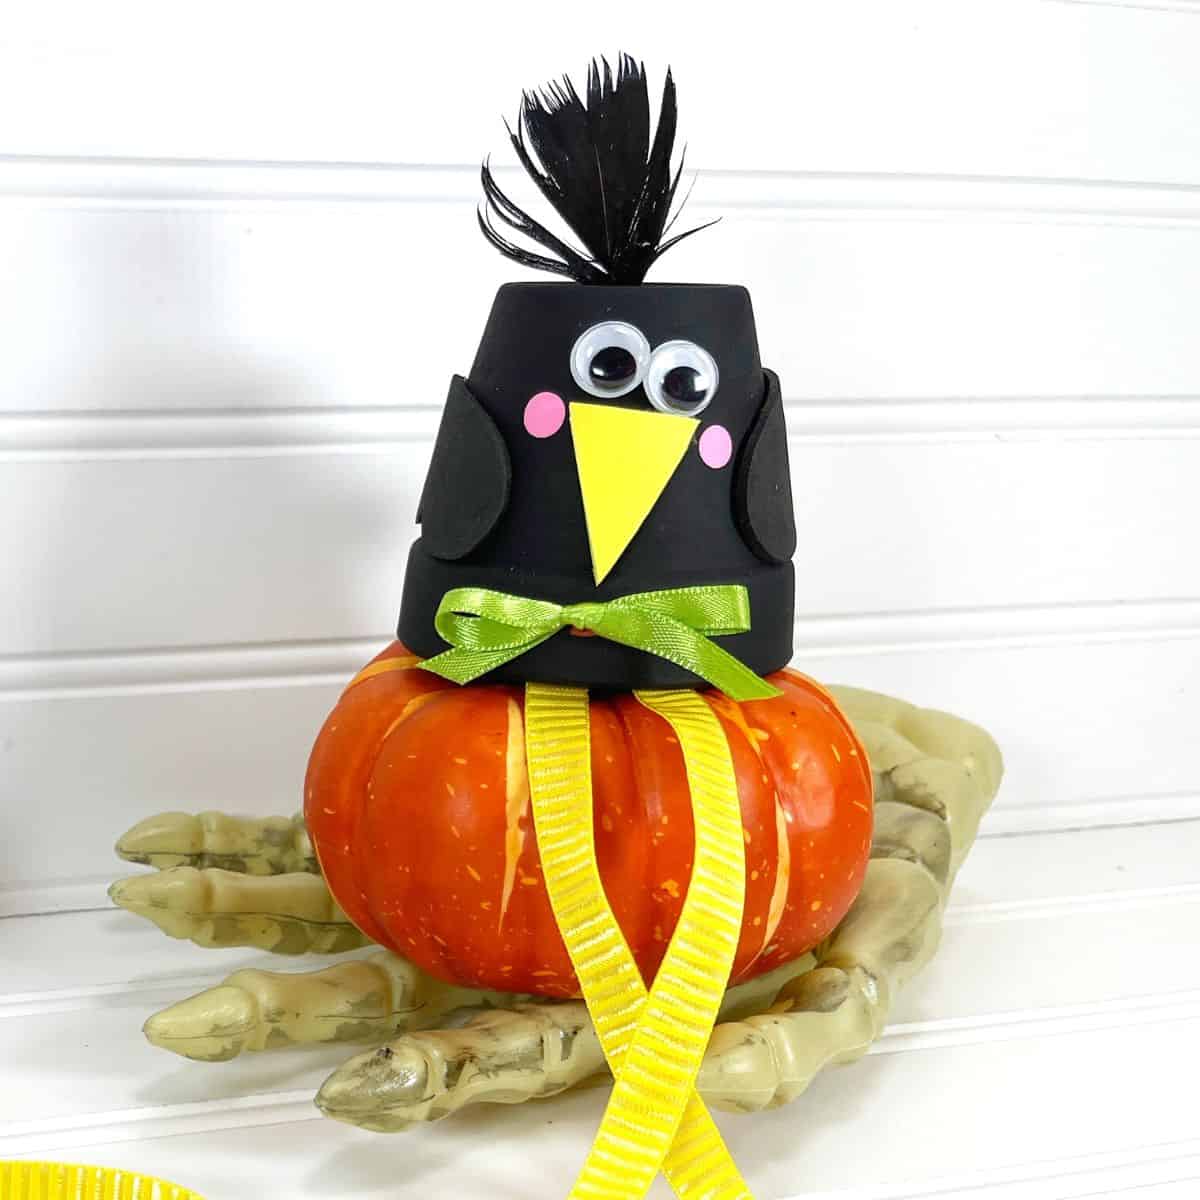
Clay Pot Crows Craft DIY idea that turns a basic terracotta pot into a cute crow or bird display.
This simple project can be made in about a half hour.

Easy clay post bird craft project.
This is a simple craft idea that is perfect for fall or Halloween decor.
I like that this craft project can be made with inexpensive materials.
Did you see my Black Cat Clay Pot Craft DIY?
That clay pot cat is another easy and cute craft idea that is easy to make. Both this clay pot bird and that clay pot cat would look cute when displayed together.
To make this project you will need terra cotta (or terracotta) clay pots. You can find a variety of terra cotta pots here.
What is a terracotta clay pot?
Technically, they are the same thing.
The difference in the spelling simply comes from the dialect or who is spelling it.
Both terracotta and terra cotta pots are ceramic pots made from clay intended for use for plants. "Terra cotta" means "baked earth" in Italian.
It is the porous material used to make the pots that allows water and air to pass through effectively for the growth of plants. These pots relatively inexpensive, easy to make, and come in a variety of shapes and sizes that them a popular choice for gardening.
Here are some used for terracotta clay pots.
• To hold other items such as pens.
• When first soaked in water, these pots can be used for baking.
• Craft displays.
• And, for plants.
Tips for making a Crow or Bird from a Clay Pot
My crow craft was made using a 2.5” in diameter clay pot. Feel free to use the size(s) clay pot(s) of your choice.
More tips for you
- If you have issues with the googly eyes staying in place, try attaching a clear water bottle cap to the pot first and then glue the eyes on to that.
- Hot glue really works best at getting everything to stick to the pot securely and quickly. However, you can use a tacky or craft glue instead if you can wait for it to dry.
- There is a bit of painting that needs to get done for this project. Make sure that the paint gets fully dry before adding additional elements or coats of paint.
How to make this clay pot craft project even better.
This clay pot crow is cute just the way it is.
You can however make yours even better.
Try one of these ideas.
- Paint your clay pot a different color such as pink or yellow.
- Decorate your bird using stickers or markers.
- Make more than than one bird in different sizes and display them together.
👇You may also be interested in these ideas!👇
Be sure to follow DIYandFUN on Facebook and on Pinterest. We also have a weekly newsletter that you can subscribe to.
✔ Be sure to follow us on Facebook, Pinterest, and Instagram.
Subscribe to our Weekly Newsletter.
About this flower pot craft diy.
This is a simple do it yourself craft idea that starts with painting a terracotta pot with black paint.
The the pot is decorated to look like a crow.
What can you do with a clay pot bird?
- Display this bird as is on a shelf or on top of a pumpkin.
- Use this clay pot bird as part of a centerpiece display.
- Write something fun on the crow and give it to someone as a gift.
Materials needed to make a clay pot craft.
- Terracotta clay pot. My crow was made with a 2.5” in diameter clay pot.
- Acrylic Craft Paint Black and Pink was used to make my crow.
- Googly Eyes. Small or medium sizes can work well.
- Craft Feathers. Used on the head of the bird.
- Craft Foam. Yellow and black were used to make my bird diy.
- Ribbon Yellow 3/8” wide used for the legs. Green – ¼” wide used for the bow. Really, you can use the color(s) of your choice.
- You will also need a scissors, paint brush, pencil, eraser, glue gun and glue sticks, scrap paper, and a ruler.

How to make a dollar store clay pot bird.
Active Time: 20 minutes.
Step One: prepare.
- Gather all of the needed materials and remove any debris or labels from the clay pot..
- Basecoat your clay pot with black acrylic craft paint.
- Once the paint has dried you can apply a second coat if needed.
- Your clay pot should be upside down for this project (opening facing down).
Expert Tip👉 While this project is suitable for most ages, some folks may need assistance with certain steps. This may be especially true when it comes to painting, glueing, and cutting.
Step Two: add the bird elements.
- To make the beak, cut out a triangle from the yellow craft foam and attach it to the clay pot about a ¾ of an inch from the top and with the point facing down. Then attach the eyes above the nose.
- To make the cheeks, simply use the eraser side of a pencil and first dab it into the pink paint and then beside the top of the nose.
- Attach the feather(s) to the top of the crow by gluing it to the drain hole.
- To make the wings, first draw a wing shape on to a scrap of paper with a pencil. Cut the wing out and then use it to trace it onto the black craft foam before cutting it out (you will need two wings). Attach the wings on opposite sides of the clay pot.
Step Three: finish making the clay pot bird.
- To make the legs, cut two 8” lengths of yellow ribbon. Loosely knot the ends of the ribbons and then attach the ribbons to the bottom center of the front of the clay pot.
- For the bow, simply make a bow using the remaining ribbon and attach it in place.
- Enjoy your clay pot crow!
Expert Tip👉 You can use an alternative glue, such as a tacky or craft glue if you have concerns about using a hot glue gun. Just be sure to allow the glue to full set.
👇Popular Ideas👇
- Chocolate Halloween Dirt Cups Dessert25 Minutes
- Easy Egg Carton Bat Craft DIY30 Minutes
- Flower Pot Frankenstein DIY Craft30 Minutes
- Pumpkin Cheesecake Cupcakes Recipe35 Minutes
In case you missed it.
Clay Pot Crows Craft DIY, an easy fall inspired do it yourself project bird made with dollar store materials, terracotta pot. Most ages.
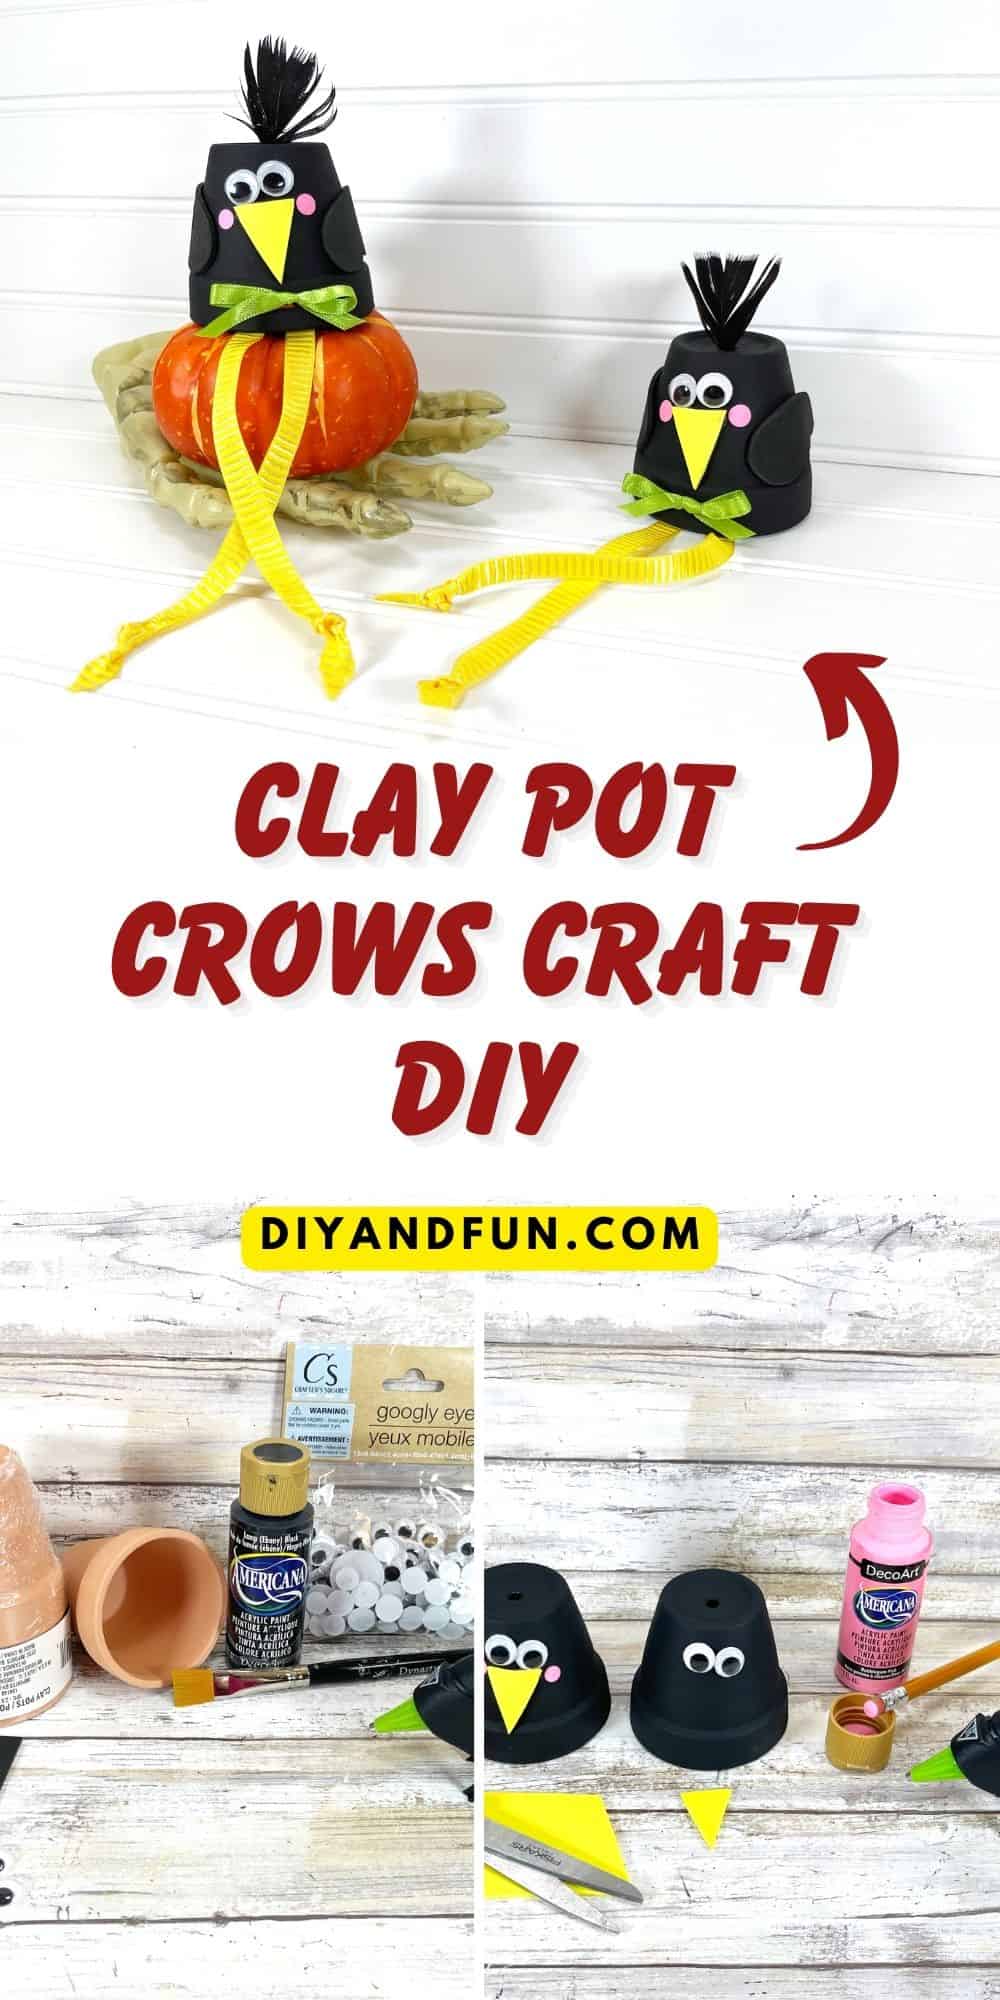
Clay Pot Crows Craft DIY
Equipment
Materials
- 1 Clay Pot
- Craft Paint - black and pink
- 2 Googly Eyes
- 2 Craft Feathers -black
- Craft Foam - yellow and black
- Ribbon - green and yellow
Instructions
- Gather all of the needed materials and remove any debris or labels from the clay pot.
- Basecoat your clay pot with black acrylic craft paint. Once the paint has dried you can apply a second coat if needed.
- To make the beak, cut out a triangle from the yellow craft foam and attach it to the clay pot about a ¾ of an inch from the top and with the point facing down. Then attach the eyes above the nose.
- To make the cheeks, simply use the eraser side of a pencil and first dab it into the pink paint and then beside the top of the nose.
- Attach the feather(s) to the top of the crow by gluing it to the drain hole.
- To make the wings, first draw a wing shape on to a scrap of paper with a pencil. Cut the wing out and then use it to trace it onto the black craft foam before cutting it out (you will need two wings). Attach the wings on opposite sides of the clay pot.
- To make the legs, cut two 8” lengths of yellow ribbon. Loosely knot the ends of the ribbons and then attach the ribbons to the bottom center of the front of the clay pot. For the bow, simply make a bow using the remaining ribbon and attach it in place.
Notes
Thanks so much for visiting!
If you decide to try any of the ideas listed in this article please tag on social media @diyandfun. We like to hear your ideas and suggestions.
DIY and Fun is a website dedicated to providing you with the best DIY projects, crafts, recipes, hiking, and fun ideas that inspire. Whether you're looking for a new way to decorate your home, learn a new skill, or simply have some fun, DIY and Fun has something for everyone.
Here are some additional ways to keep coming back to DIY and Fun:
- Sign up for our email newsletter. We'll send you weekly updates with new projects, inspiration, and more.
- Follow us on social media. We're on Facebook, Twitter, and Pinterest.
- Our community forum is coming soon. Share your projects, ask questions, and get inspired by other DIYers.


