
DIY Decoupage Coaster Project is really rather simple to do.
I like that these coasters are especially perfect gifts to give to people.

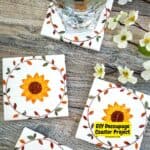
DIY Decoupage Coaster Project
This is a simple craft project for turning a square ceramic tile into a nifty looking coaster.
Also, this is a suitable do it yourself project idea for many ages to make.
Did you see my DIY for How to Decorate Pots with Seashells?
That seashell project is another project that is rather simple to make.
Like with this coaster DIY, that decorated pot would make for a nice homemade gift idea!
To make this project you will need ceramic tiles, preferable unglazed. You can find unglazed ceramic tiles here (many come with the cork backings too!).
People sometimes ask what is decoupage and how do you do it.
Decoupage is a process for attaching images or print to a surface.
The attached images or prints are then sealed.
You may have done some sort of decoupage project in the past.
People like to decoupage boxes for example using images cut out from magazines. Collages are also popular ideas when it comes to decoupage.
You may be wondering is it easy to decoupage.
Really, decoupage is as easy as you want it to be. That is, decoupage can be as simple as making a greeting card or as complex as making an impressive tabletop.
How do you start a decoupage project?
I would start with a simple project, such as this one. Follow the directions and learn how to start the process for best results.

Tips for decoupage projects.
When selecting an image to use, make sure that it will fit on to the ceramic tile.
Do this before actually cutting the image out.
More tips for you
- This project uses a napkin for the image. Napkins are super easy to use and they can be coordinated well with the finished coaster.
- If you decide to use a photo or printed image, stick to a thinner paper. Thicker paper of any kind will have difficulty sticking to the tile.
- Sometimes that Mod Podge can cause an image bubble up. Removing the bubbles is similar to when you put a screen protector on your phone. Use a ruler or similar item to work the bubbles out from center to the edges.
Personalize your decoupage tiles.
This project is easy and colorful when you use a beverage or similar kind of napkin.
There are some ways to make this project even better.
Try one of these ideas.
Subscribe to DIYandFun
- Instead of using a napkin, use printed words from a newspaper, magazine, or something personal such as program from an event.
- Personalize this for a gift recipient by using their photo or something relevant such as a wedding invitation.
- Add some glitter between layers make the coasters sparkle. I suggest that you allow the layer to fully set to prevent the glitter from traveling.
You may also be interested in these ideas.


About this decoupage do it yourself ideas.
This is a simple project for turning a napkin and a tile into a beverage coaster.
The materials used in this project are relatively inexpensive.
To make this project using a napkin, you will need a thicker napkin such as a beverage napkin.
When selecting a napkin to use in this project, select a napkin that is at least the same size as your ceramic tiles. Also, select a napkin that has an appealing pattern.

Materials needed to make this decoupage project.
- Ceramic Tiles- Select tiles that are unglazed for best results. If your tiles are glazed you can sand the tile glaze. My tiles in this project are 4" squares.
- Decorated paper napkins such as beverage napkins or dinner napkins.
- Mod Podge (I like gloss for this project). However, if you are concerned with sweaty beverage glasses, select a Mod Podge that can handle getting wet.
- Foam brush. One to two inch size brush works well with this project.
- Tacky Glue. Tacky glue is thicker than the usual school glue. As a result, it does a better job at adhering things such as napkins to ceramic tiles.
- A backing for the tiles such as felt sliders or cork (which often comes with craft tiles).
- You will also need a scissors to cut your design out from the napkin.

How to make this DIY Decoupage Coaster Project
Step One: select the design to be used from the napkin.
Fully open the napkin up and place it by the tile to get an idea of how the design will sit on the tile.
Then use your scissors to cut the design out.
Also, prepare your work area as needed for a craft project.
Step Two: attach the design to the ceramic tile.
PRO TIP=> Use a short and wide can, such as a stew or soup can, to prop the tile on top of as you will be applying Mod Podge to the sides of the tile and you do not want it to stick to your work area.
- Prepare the ceramic tile by using the foam brush to apply Mod Podge to the top and the sides of the tile.
- Set the selected napkin design on top of the tile.
- Gently smooth out the napkin, working from the center to the edges, to work out the air bubbles.
- Fold the napkin over the Mod Podge coated edges of the tile.
Step Three: seal and finish the coasters.
To seal the napkin design to the tile you will need to apply three layers of Mod Podge. Apply each of the layers thin and include the sides of the tile. Also, allow the Mod Podge to fully dry between layer applications.
Once the three layers of Mod Podge have fully dried, you can attach the backing to the tiles. It is a good idea to use a strong glue if needed for this.
DIY Decoupage Coaster Project, a simple project for turning a napkin and ceramic tile into a handy drink coaster. Most ages.

DIY Decoupage Coaster Project
Equipment
Materials
- Ceramic Tiles-
- beverage napkins or dinner napkins.
- Mod Podge
- Foam brush.
- Tacky Glue
- felt sliders or cork backing
Instructions
- Fully open the napkin up and place it by the tile to get an idea of how the design will sit on the tile. Then use your scissors to cut the design out.Also, prepare your work area as needed for a craft project.
- Prepare the ceramic tile by using the foam brush to apply Mod Podge to the top and the sides of the tile.Set the selected napkin design on top of the tile.Gently smooth out the napkin, working from the center to the edges, to work out the air bubbles.Fold the napkin over the Mod Podge coated edges of the tile.
- To seal the napkin design to the tile you will need to apply three layers of Mod Podge. Apply each of the layers thin and include the sides of the tile. Also, allow the Mod Podge to fully dry between layer applications.Once the three layers of Mod Podge have fully dried, you can attach the backing to the tiles. It is a good idea to use a strong glue if needed for this.