How to Make a Snowman with instructions that most anyone can follow.
I like how building a snowman is a simple and fun way to spend some time outdoors during the winter time.
How to Make a Snowman
This is a simple guide for building a snowman.
You may find that the tips and tricks for building a snowperson in this guide are helpful
Did you see my article with 25 Fun Family Winter Activities?
That list of fun things to do features even more (inexpensive!) ideas for the winter months.
This snow activity idea would go great with many of the ideas on that list of Fun Family activities.
You may not know this but there are kits for sale that have hats, scarves, etc all in one package. You can find snow people kits here (good gift idea!).
This guide is for anyone asking how do you build a good snowman.
You can easily make a regular snowman going by what you have seen on lawns, in parks, or even on TV.
However, many of those snowmen look really good for a reason and not just by chance.
It may not seem like it is rocket science to construct a snowman.
However, there is some thought that needs to go into small things such as making sure that your snowman can stand on its own.
Also, what accessories work best for making a great looking snowman.
You may be wondering how do you build a snowman step by step.
I will go further into the details on the steps in a moment.
What you should know is that there are steps that should be followed in order.
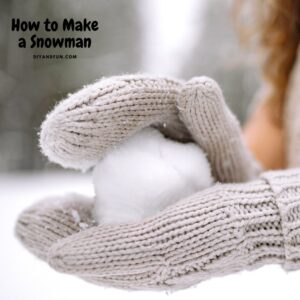
Snowmen are made with snowballs that are of different sizes.
There is always going to be a base snowball which is the sturdiest and largest of the snowballs.
On top of the base snowball will be one or two (sometimes four) snowballs, in different sizes, baking up the rest of the snowman.

Tips for making the best snowman.
What you should know is that not every kind of snow is good for making snowmen.
The best snow to use is not too wet and not too dry.
More tips for you
- The best temperature to build a snowman is 30-32 degrees Fahrenheit. Below that temperature may be too dry to hold the snow together and above that the snow will be too wet.
- When you roll the largest snowball, the base, in the snow to add size to it, make the final roll towards the spot that you want the snowman to be placed. It is a lot easier to do this than having to move it over later on.
- Those cool snowballs that you have made for the head or body can come rolling off the base. To prevent this from happening, try using a thick stick between the snowballs to help keep the balls together. Another option is to scoop out a small amount of snow from the top of the ball where the next ball will be resting.
Personalize your snowman.
This is a basic guide for building a snowman.
You can build your snowman even better.
Try one of these ideas.
- Build your snowman a snowwoman instead by adding longer hair or pink hat.
- Three snowmen of different sizes can be a snow family!
- Make an upside snowman by making the head on the larger base snowball and using twigs on top as legs.
You may also be interested in these ideas.


About outdoor snow project.
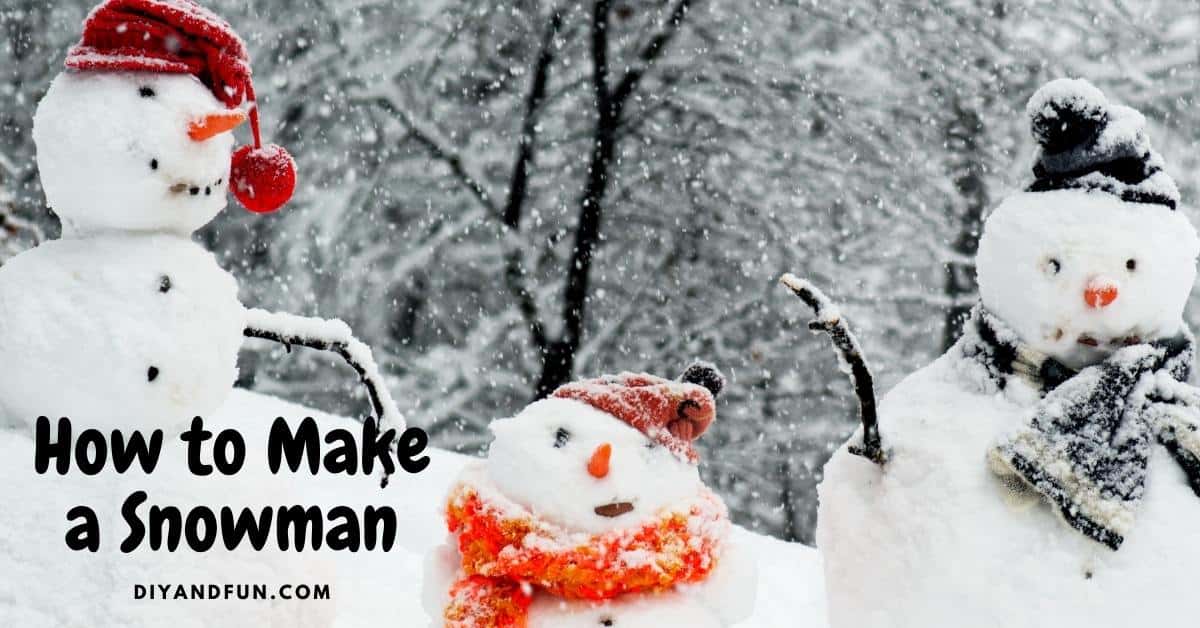
Traditional snowmen are made using two to three snowballs.
The snowballs are made into different sizes to form the body of the snowman.
Subscribe to DIYandFun
The bottom snowball is the base and the largest ball.
Then the middle snowball is where the clothing and arms will go.
Lastly, the top ball is the head of the snowman.

Materials needed to make this project
- Eyes-charcoal, rocks, golf balls or buttons.
- Nose- carrot, stick, tennis ball or icicle.
- Mouth- rocks, charcoal, plastic cup, or buttons.
- Arms- sticks, broom handles, or rules. When choosing sticks, look for sticks that have offshoots that look like and arm and fingers. you can snip off extra branches if needed.
- Accessories- Sunglasses, a hat, gloves, necktie, pipe, scarf, shovel, broom, buttons, bag, old shoes, or even a sports team flag.

The 5 steps for making a snowman
I suggest wearing a warm pair of waterproof gloves.
The snow should be packable but, not too wet
If it is too dry outside, it is probably too cold for packable snow.
Step One: make the base.
The base of the snowman is perhaps the more important piece as this will hold everything else.
Start by making a regular snowball, using both hands to pack the snow in place.
Keep packing on the snow until you have formed a well packed large snowball.
Place the snowball on the ground a good distance from where the snowman will be made (20-40 feet).
Roll the snowball in the snow, going towards your destination, packing the snow in as you roll. You may need to change position of the ball so that all of the sides are even.
Place the finished base at your destination. If the snow is deep where you have chosen as a destination location, you can dig out a small area to place you base snowball.
Step Two: make the middle section (torso) and the top (head).
Repeat the last step to make the middle section. The finished snowball should be smaller than the base snowball yet, larger than the head snowball will be. Place this snowball on to of the base.
You can dig out a small divot from the base for this snowball to sit in.
Lastly, repeat this process to form the snowball that will be the head of the snowman.
This snowball will be the smallest section however, large enough to hold the features for the face.
Step Three: Secure the sections of the snowman.
Walk around the snowman, packing in the snow as needed.
However, you can add or pack in additional snow as needed to help secure the pieces in place.
Step Four: Make the face.
Use a spoon or similar object to scoop out the areas where the eyes will go.
Next, place the objects that you have chosen to use for the eyes in the areas that you just scooped out. However, you may need to scoop out more snow or add snow to secure the eyes in place.
Repeat the process for the nose and then the mouth, thus finishing you work.
Step Five: finish the snowman.
Add arms, a scarf, hat, and any other items that your snowman will be wearing.
Then you can then add additional details such as sunglasses or a bag.
How to Make a Snowman, a fun and simple step by step guide for making a snowman with snow that most anyone can follow.


How to Make a Snowman
Materials
Nose- carrot, stick, tennis ball or icicle.
Mouth- rocks, charcoal, plastic cup, or buttons.
Arms- sticks, broom handles, or rules. When choosing sticks, look for sticks that have offshoots that look like and arm and fingers. you can snip off extra branches if needed.
Accessories- Sunglasses, a hat, gloves, necktie, pipe, scarf, shovel, broom, buttons, bag, old shoes, or even a sports team flag.
Eyes-charcoal, rocks, golf balls or buttons.
Instructions
- Start by making a regular snowball, using both hands to pack the snow in place. Keep packing on the snow until you have formed a well packed large snowball.Place the snowball on the ground a good distance from where the snowman will be made (20-40 feet).Roll the snowball in the snow, going towards your destination, packing the snow in as you roll.

- Repeat the last step to make the middle section. The finished snowball should be smaller than the base snowball yet, larger than the head snowball will be. Place this snowball on to of the base. Lastly, repeat this process to form the snowball that will be the head of the snowman.

- Use a spoon or similar object to scoop out the areas where the eyes will go.Next, place the objects that you have chosen to use for the eyes in the areas that you just scooped out. However, you may need to scoop out more snow or add snow to secure the eyes in place.Repeat the process for the nose and then the mouth, thus finishing you work. Add arms, a scarf, hat, and any other items that your snowman will be wearing.