
Adorable Clay Pot Snowman DIY that is also easy to make.
I like that there are so many ways to display this cute snowman too!

Adorable Clay Pot Snowman DIY
This is a simple diy idea for a homemade Christmas or holiday project.
There are many uses for this snowman as well!
Did you try my Easy Santa Hat Ornament Project?
That project is also made using a small clay pot.
Both projects would certainly work well together for a holiday décor!
To make this ornament you will need a small clay or terra cotta pot. You can find a great selection of small clay pots at good prices here.
This project is one of many easy clay pot ideas.
It really just takes a bit of paint along with some decorations to make this project. You can even stuff you snowman with candy.
Using small clay pots works best for this idea.
This is because small pots are easier to work with.
However, when you get the hang of making this project, you can easily try this project using larger pots too!
People ask what is the best way to paint a clay pot?
You will want to have a clean pot before you begin working on this project.
Any kind of dirt, sticky residue, or anything else can have an effect on the outcome of the project.
Gently clean the outside of the pot a day before making this project.
This will allow for enough time for the clay pot to dry out before painting it.
Also, if this Santa hat is going to be used outside, you may want to seal it.
.

Tips for making a clay pot snowman.
The base of this snowman is painted with acrylic craft paint.
You could however, try spray paint (probably in layers) to save some time.
More tips for you
- This project calls for using a glue gun with glue sticks. However, you can alternatively use a craft glue (you would have to wait for it to dry).
- The details in this project are glued on. You can easily use permanent markers instead as needed.
- This snowman project has many great uses besides holding candy. I like the idea of using these snowmen in place of seating cards at a table for a gathering.
Personalize your holiday snowman.
This project is cute and easy as is.
However, you may want to personalize your project.
Try one of these ideas.
Subscribe to DIYandFun
- Make this into a Ms. Snowperson by using pink paint instead of the blue.
- This can also be made to be an ornament. Glue an upside down pot to the top of the snowperson and include a ribbon for hanging!
- Seal the painted snowperson and use it outdoors as a decoration.
You may also be interested in these ideas.


About this snowman clay pot project.
This is a clay pot project.
You will need three small clay pots for every snowman that you make.
The clay pots will be painted.
Then we will glue the painted pots in place.
After that, we will decorate the finished project.

What you will need to make a terra cotta clay pot snowman.
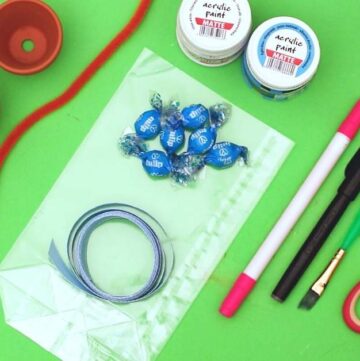
- Clay Pot- small 2.3" pot, three per snowman.
- Acrylic Craft Paint – White and Blue (or pink or other color of choice).
- Chenille Stems (pipe cleaners)- orange to make the 'carrot' nose.
- Markers to draw features.
- Ribbon.
- Glue gun, sticks.
- Scissors.
- Paint Brush.
- Optional-a small candy bag to hold the candy.
- Also Optional-goodies such as candy to dill the opening with.

How to make a Christmas Holiday Clay Pot Snowman DIY
Step One: prepare the materials.
I like to start by laying out old newspaper or a drop cloth over my work surface.
Also, I often like to use an old rimmed baking sheet to work on so that I can easily move my project as it dries or if I need to step aside.
Step Two: prepare the pots.
Start by painting the three small pots white. Set them aside to dry.
Step Three: assemble the snowman
Start this step once the clay pots have fully dried.
Glue two of the clay pots together so that their openings face one another. Simply run a line of hot glue around the rims of one of the pots and attach the rim of the other pot to that pot. Hold the pots in place while they set. Then glue the base of the remaining pot to the base of one of the glued pots. This last pot will serve as the head of the snowman as well as the holder for any treats.
Step Four: Decorate the snowman.
Paint the rim of the open pot, that you just glued on to the other two, blue. Allow this to dry.
Then use the markers to dray eyes, a mouth, a red nose, and button on the body. Cut off a piece of the pipe cleaner and hot glue it to the nose so that it looks like a carrot.
Tie a ribbon around the 'neck'.
Lastly, fill the opening with goodies!
Adorable Clay Pot Snowman DIY, an easy homemade Christmas or holiday decoration made from a small terra cotta pot.


Adorable Clay Pot Snowman DIY
Ingredients
Instructions
- Start by painting the three small pots white. Set them aside to dry. Start this step once the clay pots have fully dried. Glue two of the clay pots together so that their openings face one another.Then glue the base of the remaining pot to the base of one of the glued pots. This last pot will serve as the head of the snowman as well as the holder for any treats.

- Paint the rim of the open pot, that you just glued on to the other two, blue. Allow this to dry. Then use the markers to dray eyes, a mouth, a red nose, and button on the body. Cut off a piece of the pipe cleaner and hot glue it to the nose so that it looks like a carrot. Tie a ribbon around the 'neck'.

Recipe Notes
originally posted:
November 18, 2021*As an Amazon Associate I earn from qualifying purchases. This means that the links on this website, and specifically on this post, that lead to other sites may be affiliate links.
Please note: Nutritional data has been calculated using a tool that comes with this recipe card and not by me. This means that Nutritional Information is only an estimate and can vary especially with ingredients that you use. The accuracy of this tool may differ from other tools as expected. Also note that there is no instructional value to the video that may be attached to this recipe. It is only there for visual pleasure. For more information about the images in this recipe, please refer the the recipe instructions. Thank you!
Follow Me