
DIY Geode Bath Bombs are both colorful and useful.
I like that these bath bombs make for a nice gift idea too!

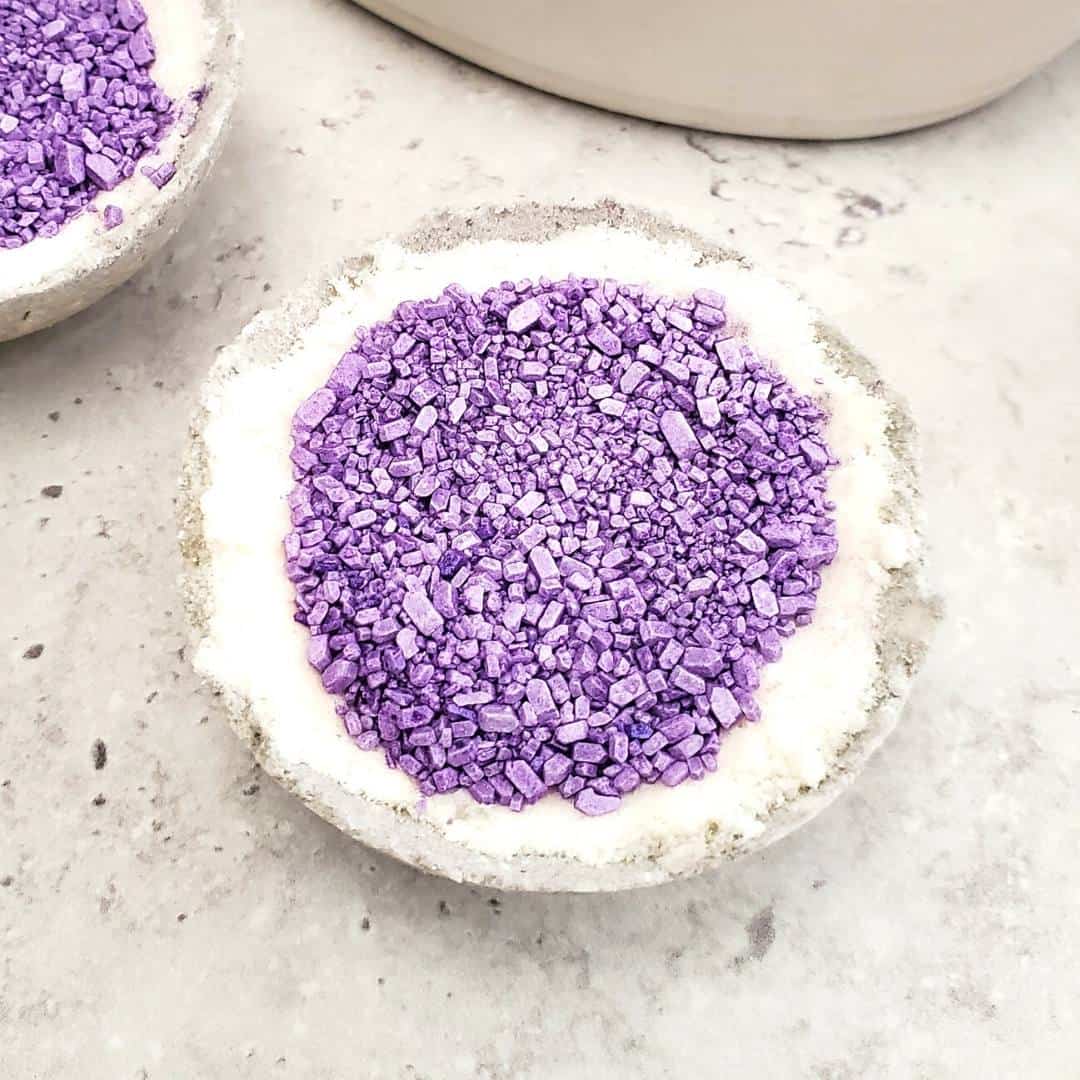
DIY Geode Bath Bombs
These bath bombs are both colorful and soothing.
All that you need to do in add them to the running water in your tub and enjoy the fizz!
Did you try my DIY Milk Bath Bombs?
Those milk bath bombs are moisturizing and perfect for dry skin.
This geode bath bombs are colorful and are make for a soothing bath.
To make this bath bomb you will need a large bath bomb mold. You can find bath bomb molds here.
You may be wondering what are Geode bath bombs?
This is basically a bath bomb.
A bath bomb contains about everything that you need to thus make the water in your bath even better.
These bath bombs are intended to make for a relaxing bath.
Epsom salts are added to these bombs to serve as a muscle relaxant.
Also, Epsom salts can help draw out toxins and bloat, which can make about anyone feel better right?
What exactly is a geode?
Technically, a geode is a rock.
Geodes are hollow rocks that are lined with those colorful minerals or crystals.
These bath bombs are not real rock geodes.
They are bath bombs that are made to look like geodes.
Since geodes are colorful and rare in some locations, their look is copied really just for a fun effect, at least in this DIY project.

Tips for making bath bombs.
These bath bombs become fizzy when they come in contact with water. If you do not wat the fizzy effect, you can omit the citric acid that is used (if you have sensitive skin for example).
More tips for you
- Cornstarch is added to these bath bombs. This is done to slow down how long it takes for your bath bomb to fully dissolve and thus, allow you to enjoy the full bath bomb longer.
- This recipe also uses sweet almond oil. Sweet almond oil is used as a moisturizer for this skin.
- Colorful mica powder is used to make the purple and silver coloring for these bombs. If you do not want the color, you can omit the mica powder.
Personalize your bath bombs.
These bath bombs are really cool just the way they are.
However, you can make them even more fun.
Try one of these ideas.
- Instead of purple, use another color mica powder such as pink.
- Wrap the bomb in a cellophane gift bag to give as a gift.
- Add a few drops of essential oil to make your bath smell better.
You may also be interested in these ideas.


About this bath bomb diy project.
This is a do it yourself project for making homemade bath bombs.
These bath bomb as shaped like a geode rock for a bit of fun.
Subscribe to DIYandFun
To make this bath bomb you will need Epsom salts.
The Epsom salts are added to help make the bath more relaxing physically.
Almond oil is also added to make the bath moisturizing as well.

Ingredients needed to make bath bombs.
- Baking Soda- ½ cup.
- Citric Acid- ¼ cup.
- Cornstarch- ¼ cup.
- Epsom Salts- ½ cup divided.
- Silver Grey Mica Powder- 1 teaspoon.
- Purple Mica Powder- 1 teaspoon.
- Sweet Almond Oil - 1 tablespoon.
- Water- ½ tablespoon.
Equipment needed.
* I am suggesting glass as it will not absorb color or ingredients and will also be easier to clean.
How to make DIY Geode Bath Bombs
Step One- make the base.
In a large glass bowl, use a whisk to combine together the baking soda, citric acid, constarch, and ½ cup of the Epsom salts.
Next, in a clean jar, combine together the almond oil and the water. Place the lid on to the jar and shake well. We will next add the wet contents from the jar to the bowl however, to do so you will need to use on hand to whisk the ingredients while the other hand is slowly pouring the wet ingredients into the bowl. Take out ⅓ cup of the mixture and transfer it to a smaller bowl.
Step Two: add color and fill the molds.
Add the silver grey mica to the mixture in the larger bowl and stir until the color is solid.
Next, transfer mixture to one bath bomb mold filling it half way. You will need to press the mixture into the sides of the mold in order to coat the mold with silver color. Repeat this process with the remaining molds.
Next, add a spoonful of the non-colored mixture into the center of the molds and press it in well, but not to the edges. Make sure that you can still see the silver grey edges.
Allow bath bombs to set for a day, then unmold them by gently pushing from one side until they release.
Step Three: finish making the bombs.
Combine together the purple mica powder with the remaining Epsom salts using a small whisk until the salts are fully purple.
Then you can place a small spoonful of purple salts to the center of each bath bomb, making sure that you can still see the edges of the silver grey and the white.
Store your geodes upright in a flat container to keep them intact.
You can also wrap them in plastic wrap.
DIY Geode Bath Bombs, a do it yourself recipe for making bath bombs that are perfect for a relaxing and soothing bathing experience.

DIY Geode Bath Bombs
Materials
- Baking Soda- ½ cup
- .Citric Acid- .
- ¼ cup Cornstarch
- ½ Epsom Salts d. divided.
- 1 tsp Silver Grey Mica Powder
- 1 tsp Purple Mica Powder
- 1 tbsp Sweet Almond Oil - 1 tablespoon.Water- ½ tablespoon.
- ½ tbsp Water-
Instructions
- In a large glass bowl, use a whisk to combine together the baking soda, citric acid, constarch, and ½ cup of the Epsom salts. Next, in a clean jar, combine together the almond oil and the water. Place the lid on to the jar and shake well. We will next add the wet contents from the jar to the bowl however, to do so you will need to use on hand to whisk the ingredients while the other hand is slowly pouring the wet ingredients into the bowl. Take out ⅓ cup of the mixture and transfer it to a smaller bowl.
- Add the silver grey mica to the mixture in the larger bowl and stir until the color is solid. Next, transfer mixture to one bath bomb mold filling it half way. You will need to press the mixture into the sides of the mold in order to coat the mold with silver color. Repeat this process with the remaining molds. Next, add a spoonful of the non-colored mixture into the center of the molds and press it in well, but not to the edges. Make sure that you can still see the silver grey edges. Allow bath bombs to set for a day, then unmold them by gently pushing from one side until they release.
- Combine together the purple mica powder with the remaining Epsom salts using a small whisk until the salts are fully purple.Then you can place a small spoonful of purple salts to the center of each bath bomb, making sure that you can still see the edges of the silver grey and the white.