Tissue Paper Christmas Tree DIY is really an easy craft idea.
I like that this holiday craft project is suitable for many ages too!

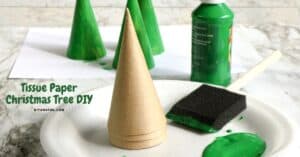
Tissue Paper Christmas Tree DIY
This is a simple craft idea that makes for a cute decoration during the holiday season.
Even better, kids of most ages can make this tissue tree too!
Did you try my Clothespin Poinsettia Ornament project?
That ornament project is another easy homemade holiday idea.
Both this project and that one would be great to display together as decorations for Christmas!
To make this project, you will need Paper Mache Cones. You can find Paper Mache Cones here.
This project is for anyone looking for diy tissue paper Christmas decorations.
There really are a lot of diy projects for the holidays that use tissue paper.
This project uses the tissue paper in a different way than others that I have seen.
These tissue paper trees are a three dimensional holiday tree.
You could easily make this project more simple by just gluing the tissue paper on to the paper Mache cone. However, to make this a three dimensional project you should follow the directions listed below.
People do ask what are the most popular Christmas colors.
Obviously, green is a popular Christmas color.
Specifically, a green that reminds us of evergreen trees.
To make your diy holiday tree resemble an evergreen tree, you should use green tissue paper.
There are several shades of green paper that you can choose from.
Or, you can use the other popular Christmas colors such as red and white that you can use.

Tips for making a tissue paper tree.
This really is a good craft idea for kids of most ages.
You can easily use craft glue sticks that are kid friendly too.
More tips for you
- I like to do projects such as this one on old rimmed baking sheets. This makes it easy to take a break and simple relocate my project as needed for safe keeping.
- Paper Mache Cones are sturdy and the desired base to use for this project. Alternatively, you can make your own cone using thin poster board or cardboard.
- My instructions call for painting the cone before gluing on the tissue paper. You can really use any color of paint if you want to.
Personalize your tissue paper cone tree.
This tissue paper tree looks great just the way it is.
However, there are ways to make it even better!
Try one of these ideas.
- Add a small craft bird to your tree.
- Put a star to the top of your tree.
- Place some small packages at the base of your tree display.
Subscribe to DIYandFun
You may also be interested in these ideas.


About this Tissue Paper Christmas Tree project.
This is simple holiday craft project to make a small tabletop tree.
You can display this tree on a table or even give it away as a gift.
To make this project you will need a Paper Mache Cone .
Also needed is tissue paper and paint.
You can also add additional ornaments to your tree.

Materials needed to make this project.
- Paper Mache Cones
- Green paint
- Glue
- Tissue paper squares in red and green .
- Unsharpened pencil.

How to make this Tissue Paper Christmas Tree DIY
Step One: prepare your work area.
Lay out old newspaper or some kind of protection for your works space.
Assemble the materials.
Cut the tissue paper into 1" squares.
Step Two: Paint the cone.
Place the cone on something that can turn (like a cake turner) if possible.
Then paint the cone using green paint.
Allow the paint to dry fully.
Step Three: glue the tissue paper on.
I suggest starting on the bottom of the cone and working your way up with the tissue paper.
Also, work in small batches when it comes to gluing.
Apply a small amount glue to a small area of the cone first.
Then twist a tissue paper square around the end of a dull pencil and then press the square from the pencil on to the glue.
Repeat this process working your way up from the base of the cone to the tip.
You can add other colored tissue squares as needed for accents.
Allow for your glue to dry completely before moving the tree.
Tissue Paper Christmas Tree DIY, a simple Christmas Holiday DIY craft project for making a Christmas tree using tissue paper.


Tissue Paper Christmas Tree DIY
Instructions
- Lay out old newspaper or some kind of protection for your works space. . Cut the tissue paper into 1" squares. Place the cone on something that can turn (lake a cake turner) if possible. Then paint the cone using green paint. Allow the paint to dry fully.

- I suggest starting on the bottom of the cone and working your way up with the tissue paper. Apply a small amount glue to a small area of the cone first. Then twist a tissue paper square around the end of a dull pencil and then press the square from the pencil on to the glue. Repeat this process working your way up from the base of the cone to the tip. You can add other colored tissue squares as needed for accents. Allow for your glue to dry completely before moving the tree.