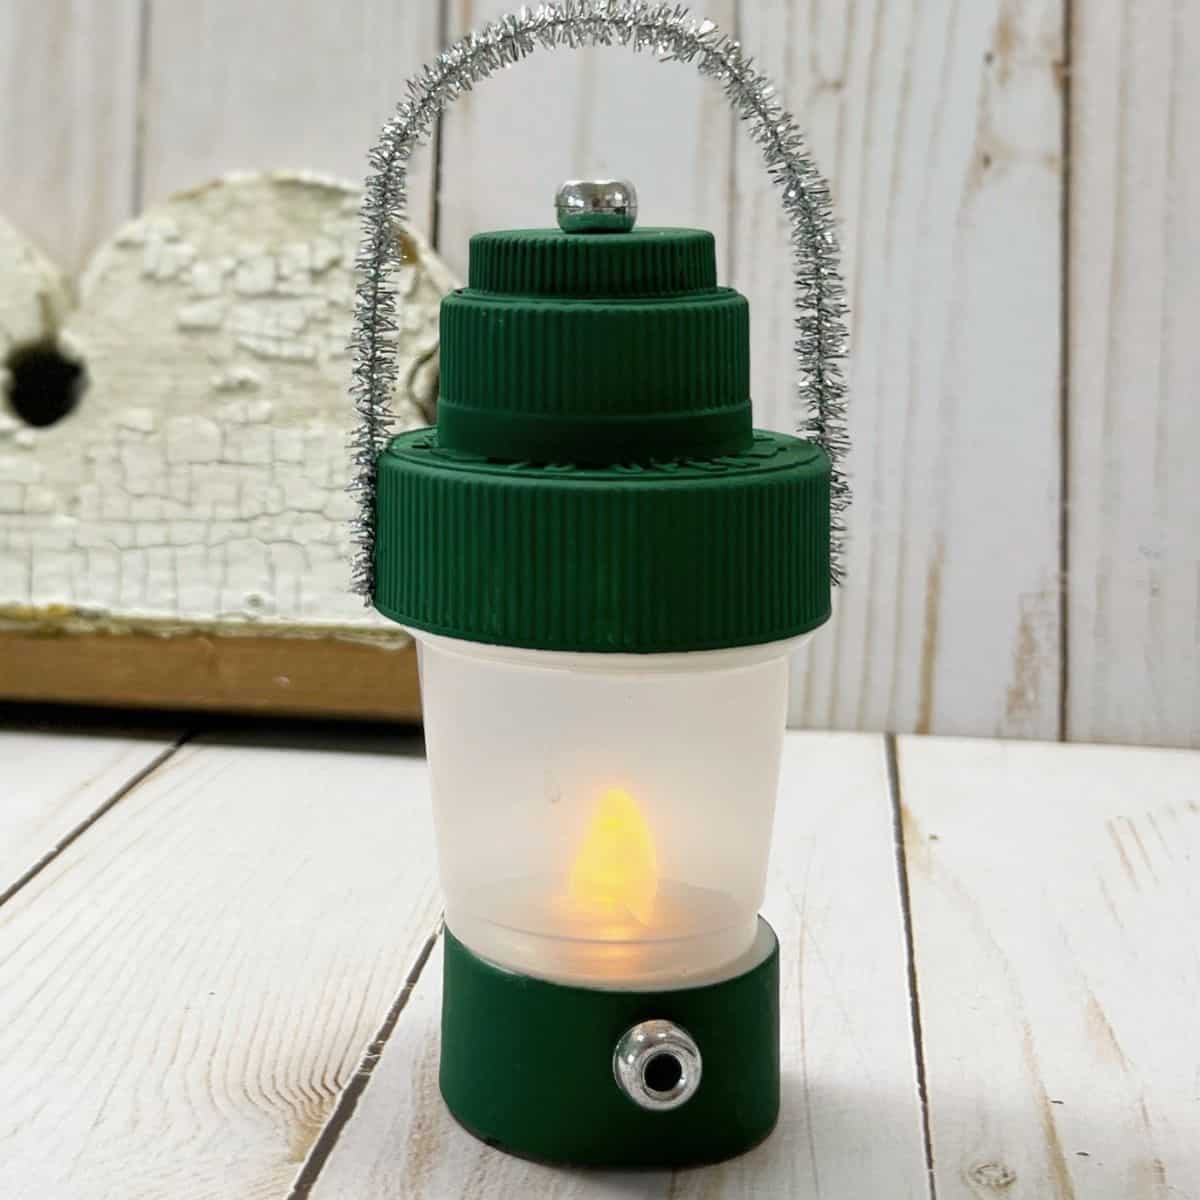
Easy Votive Camping Lantern Craft DIY project that is especially perfect for kids looking for something fun to make.
This simple craft idea features dollar store materials as well as a few upcycled items.

Votive lantern craft idea.
This is a simple craft idea that actually lights up.
It is also a fun craft idea for summer or even when you are on a family camping trip.
Did you read about Fun Nature Activities For Kids ?
That article about fun nature activities for kids includes ideas that you can do at home.
Both this lantern craft and that nature activity listing are especially for weekend or school break activities.
To make your lantern light up, you will need battery operated tea lights. You can find a selection of tea lights here.
Questions asked about votive tea light crafts.
A 'tea light' is a kind of votive that is about 1.5 inches in diameter and 0.5 inches tall. Votive tea lights can have a flame or they can be 'flameless'.
The votive tea light that is used in this project has no flame or 'open flame (actual fire)'. These candles are typically powered by batteries and use LED lights to create the illusion of a flickering flame.
When you are making a craft project that you would like to have the illusion of a tea light flame, a tea light that is flameless is a good choice. This is especially true if you do no want to start a fire.
Other reasons to use a flameless votive:
- Flameless tea light votive do provide some light.
- The are relatively inexpensive and easy to find.
- These flameless votives are friendly to many ages when it comes to being safe.

Tips for making this camping lantern craft.
As mentioned, this craft idea is suitable for most ages. However, some folks may need assistance with cutting (using a craft knife) and glueing (using a glue gun).
More tips for you.
- My local dollar store has many of the materials needed to make this do it yourself idea. While the materials are relatively inexpensive anywhere, you can check your local dollar store out to save a few dollars.
- Three different sized lids are used to make the top of the lantern. You can get creative and look around your home for these lids in your kitchen. medicine cabinet, and even in your recycle bin.
- Pony Beads are also used as part of the detailing. Any color pony bead(s) can be used. Those are really basic beads that most 'crafty' people have on hand already.
How to make your camping lantern craft even better.
Yes, this lantern is both simple and cute just the way it is.
However, you can make yours even better.
Try one of these ideas.
- Instead of painting your lantern green ,use another color or even colors. You can paint the cup too which can make the votive more interesting.
- Let kids decorate their lantern(s) using small stickers or markers.
- Make more than one lantern and them use a rope or string to hang them at your campsite or yard for decorative lighting.
👇You may also be interested in these ideas!👇
👉Be sure to follow us on Facebook, Pinterest, and Instagram.
Subscribe to our Weekly Newsletter.
About this easy Camping Lantern craft idea.
This is a simple craft idea that uses inexpensive and upcycled materials to make.
The finished lantern can actually work as we are using tea lights.
Here are some ideas on what to do with your lantern when you are done making it.
- Use your homemade lantern as a decoration for a picnic table.
- Give a lantern to someone as a gift.
- Actually use your lantern for light.
Materials needed to make this Easy Votive Camping Lantern Craft DIY.
- Tea Lights. The tea light will actually light up your lantern.
- Medicine Cup. My lantern was made using a one ounce disposable medicine cup like the ones that you get with cold medicine.
- Small Plastic Lid. The small plastic lid used to make my lantern came from a water bottle.
- Medium Plastic Lid. My lantern was made using a lid that is from the bottle of liquid cold medicine.
- Large Plastic Lid. My large plastic lid came from a container of daily vitamins.
- Acrylic Craft Paint. Dark green paint was used to paint my lantern.
- Pony Beads. Any color can work. Silver ones were used to make my lantern.
- Tinsel Pipe Cleaner. This was used to make the handle for my lantern.
- You will also need: paintbrush, glue gun and sticks , scissors, and a craft knife.
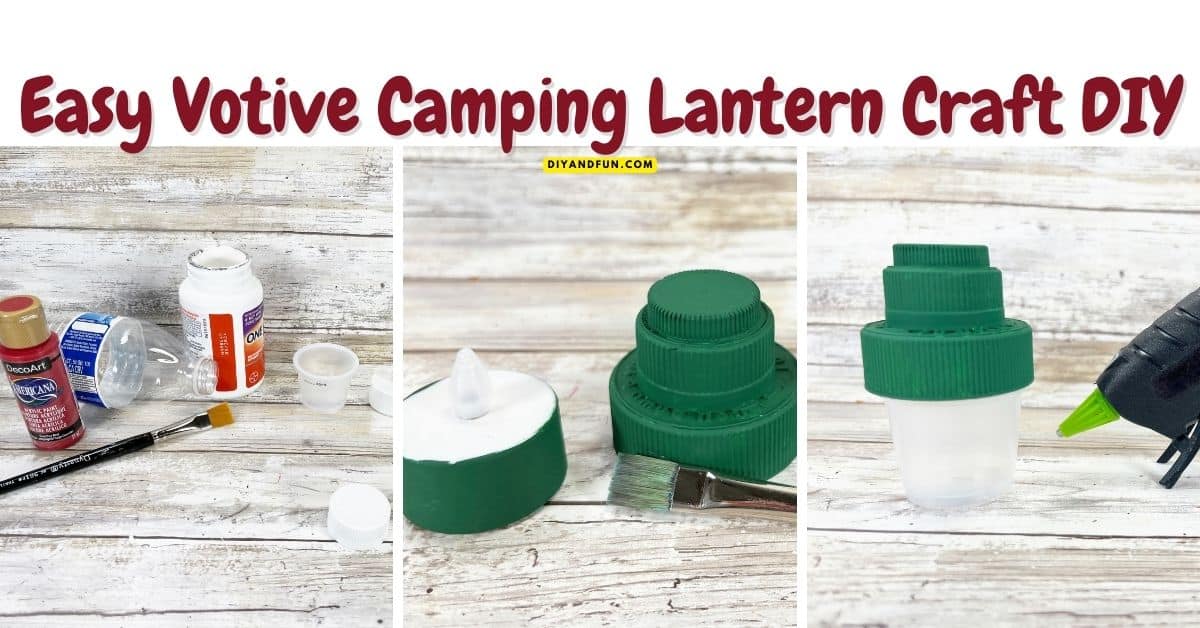
How to make an Easy Votive Camping Lantern Craft DIY
Step One: prepare your materials.
Gather your supplies and make sure that they are free of debris and stickers. Your upcycled materials should be clean and dry as well.
Step Two: Prepare the base and the top of the lantern for painting.
- To make the lantern base, you will need to first make a hole in the bottom of the medicine cup for the votive light to fit into. Start by placing the bottom of the cup over the votive light to make an indent in the center of the bottom of the cup. Then carefully cut an "X" on this location to make a square shaped hole (by peeling the flaps away) for the light to fit into.
- To make the top of the lantern, stack the three lids with the largest on the bottom and the smallest on top. Use a glue gun to secure these in place.
- Paint the outside of the base (tea light) as well as the stacked lids. You may need to apply additional layers of paint as needed to get your desired color.
Step Three: Attache the base to the top.
- To attach the top of the lantern to the base, first make sure that the 'flame' from the tea light is poking through the hole that you made in the bottom of the cup.
- Use your glue gun as needed to set the base in place.
- Next, place the stacked lids on top of the cup and glue them in place.
Expert Tip👉 While a glue gun works well and dry fast, you can alternatively use a craft glue to make this project. You will however, need to allow the glue to dry.
Step Four: Finish making the lantern.
To make the handle, curve the pipe cleaner and glue it in place on the bottom lid. You may need to cut the pipe cleaner depending on how large you want your handle to be. Lastly, glue a bead on to the top of the lantern and a bead in the center of a side of the base.
👇Popular Ideas👇
In case you missed something.
- Votive lantern craft idea.
- Questions asked about votive tea light crafts.
- Tips for making this camping lantern craft.
- How to make your camping lantern craft even better.
- About this easy Camping Lantern craft idea.
- Materials needed to make this Easy Votive Camping Lantern Craft DIY.
- How to make an Easy Votive Camping Lantern Craft DIY
Easy Votive Camping Lantern Craft DIY, a simple craft idea that is suitable for many ages and made with dollar store and upcycled materials.
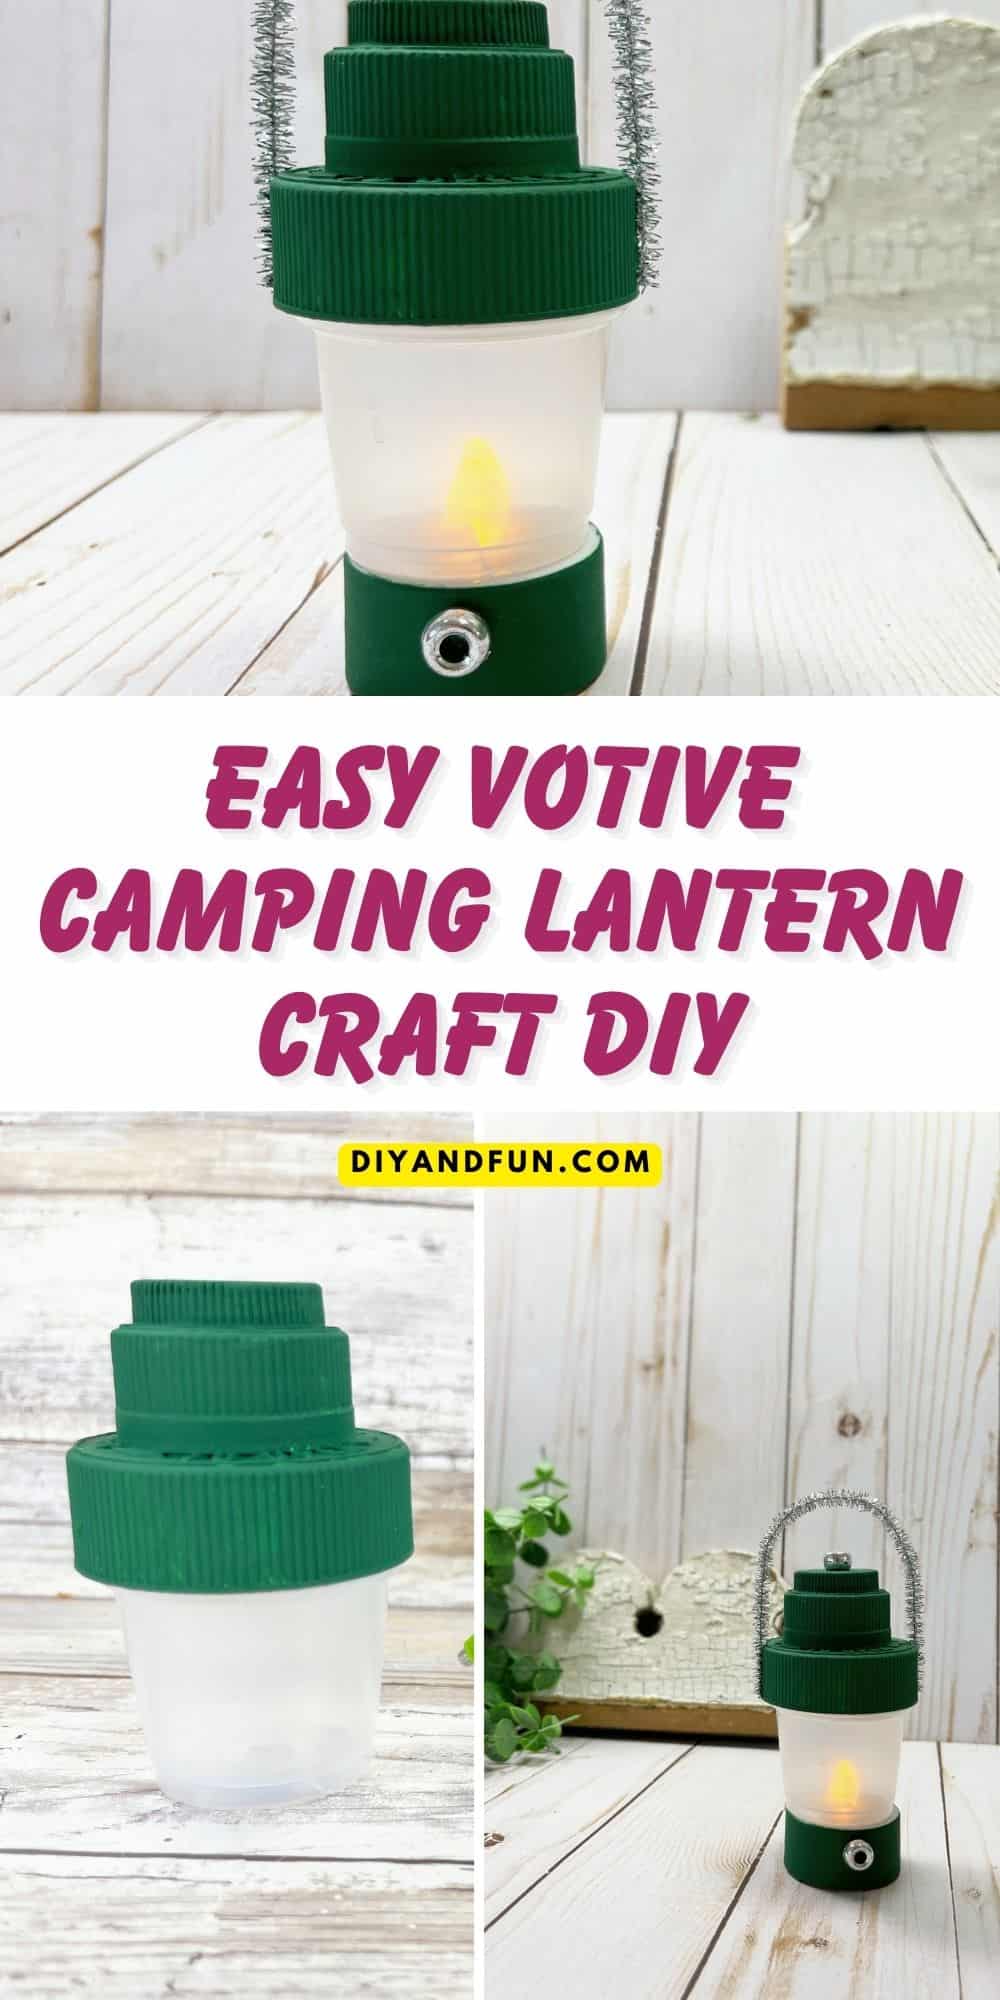
Easy Votive Camping Lantern Craft DIY
Materials
- Acrylic Craft Paint Green
- Tea Light
- Plastic Lids - small, medium, and large
- Pony Beads
- Tinsel Pipe Cleaner
Instructions
- To make the lantern base, you will need to first make a hole in the bottom of the medicine cup for the votive light to fit into. Start by placing the bottom of the cup over the votive light to make an indent in the center of the bottom of the cup. Then carefully cut an "X" on this location to make a square shaped hole (by peeling the flaps away) for the light to fit into.
- To make the top of the lantern, stack the three lids with the largest on the bottom and the smallest on top. Use a glue gun to secure these in place.
- Paint the outside of the base (tea light) as well as the stacked lids. You may need to apply additional layers of paint as needed to get your desired color.
- To attach the top of the lantern to the base, first make sure that the 'flame' from the tea light is poking through the hole that you made in the bottom of the cup. Use your glue gun as needed to set the base in place.
- Next, place the stacked lids on top of the cup and glue them in place
- To make the handle, curve the pipe cleaner and glue it in place on the bottom lid. You may need to cut the pipe cleaner depending on how large you want your handle to be.
- Lastly, glue a bead on to the top of the lantern and a bead in the center of a side of the base.
Thanks so much for visiting!
If you decide to try any of the ideas listed in this article please tag on social media @diyandfun. We like to hear your ideas and suggestions.
DIY and Fun is a website dedicated to providing you with the best DIY projects, crafts, recipes, hiking, and fun ideas that inspire. Whether you're looking for a new way to decorate your home, learn a new skill, or simply have some fun, DIY and Fun has something for everyone.
Here are some additional ways to keep coming back to DIY and Fun:
- Sign up for our email newsletter. We'll send you weekly updates with new projects, inspiration, and more.
- Follow us on social media. We're on Facebook, Twitter, and Pinterest.
- Our community forum is coming soon. Share your projects, ask questions, and get inspired by other DIYers.


