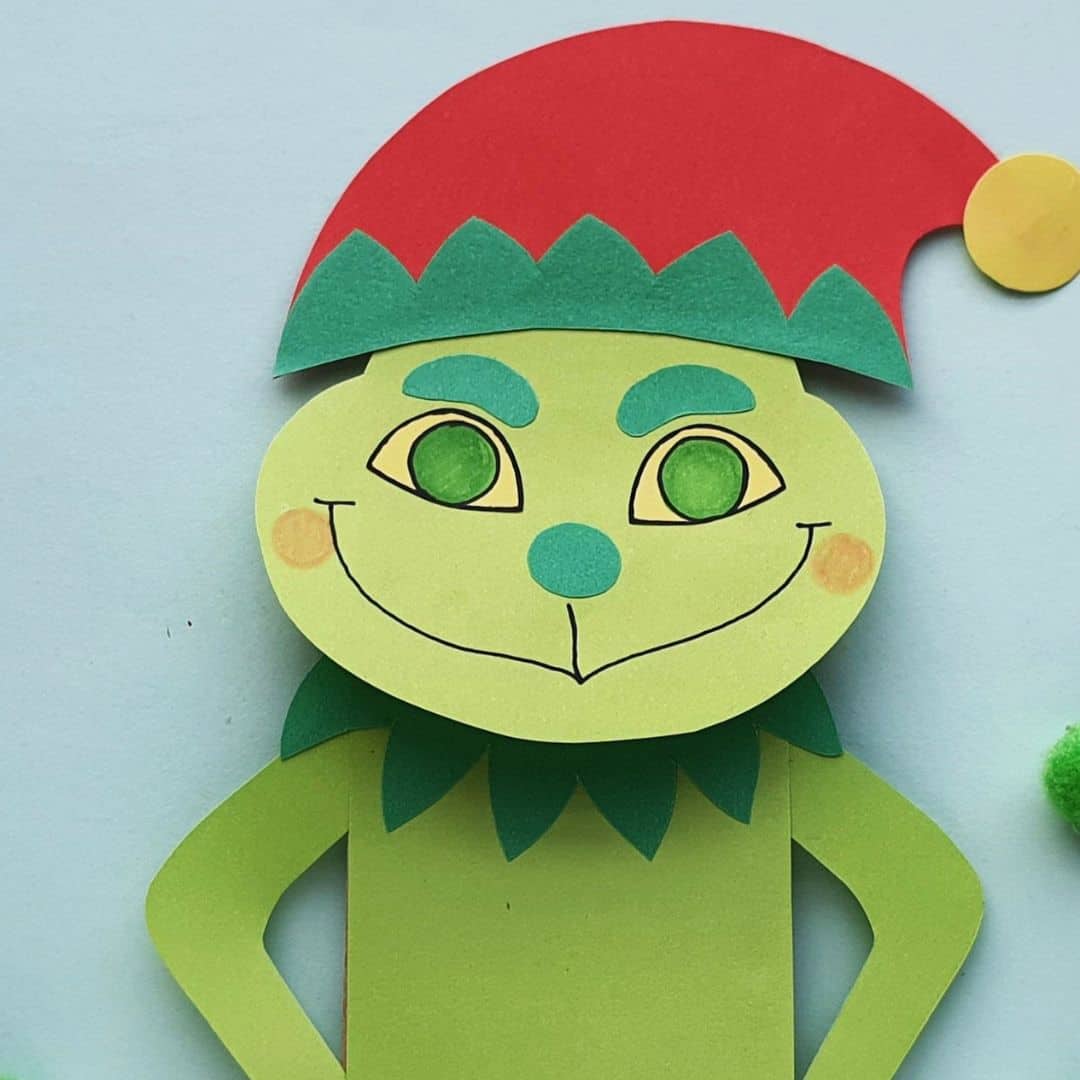
A simple Grinch Paper Bag Puppet Craft DIY that is also fun to play with.
I like that this craft DIY is suitable for most ages too!

Grinch Paper Bag Puppet Craft DIY
This project turns a paper lunch bag into a fun puppet in about 20 minutes.
Even better, most of the materials used in this project can be found at a dollar store.
Did you see my recipe for Grinch Inspired Ginger Sandwich Cookies?
If you are a fan of the green fella, you may be interested in those cookies too. Both this puppet craft idea and those Grinch cookies would go nicely together at a party of fun afternoon.
To make this project you will need a sturdy paper lunch bag. You can find a selection of paper lunch bags here.
Frequently asked questions about paper bag crafts.
Well, for one thing, you can make a puppet, such as this one.
You may have done this as well in the past.
Paper lunch bags really are the perfect medium for making a simple puppet.
Not only are paper lunch bags the right size and shape, they are also easy to color or attach elements to.
"Grinch" or the name "Grinch" refers to a fictional character from a holiday book (movie,etc.). The Grinch character rejects the holiday season, as the tale goes, because his heart too small. However, when he realizes how wonderful the season can be, his heart grows and he becomes a better character.

Tips for making a paper bag craft.
Using a sturdy paper bag will help make your puppet last longer. However, if your paper bag tears, you can try using invisible tape to contain the tear.
More tips for you.
- If you are using craft glue, it is best to go small with the amount of glue used to attach elements to the bag. This will help prevent glue from leaking or wrinkles appearing.
- Trace and cut out your elements before starting this project. This will make it easier for you to continue with the directions.
- While this project is suitable for most ages, some folks may need some assistance when making the craft diy. This is especially true when it comes to tracing and cutting.
Personalize this Grinch project.
Yes, this is a really cute idea especially during the holiday season.
However, you can make yours even better!
Try one of these ideas.
- Add a craft pompom to the hat rather than cutting out and using a circle.
- Allow kids to use crayons or markers to decorate the Grinch.
- Glue a craft heart on to the body.
👇You may also be interested in these ideas!👇
👉Be sure to follow us on Facebook, Pinterest, and Instagram.
Subscribe to our Weekly Newsletter.
About this puppet craft project.
This is a simple project for make a puppet out of a paper lunch bag.
The puppet has been inspired by the popular Grinch character.
To make this project, you will first need to download the template that is provided.
Then you can cut out the template elements, trace them on to paper, and then glue them on to paper bag.
The project can be completed in less than 20 minutes for most people.

Materials Needed to Make this Grinch Craft.
- Construction Paper. To make a Grinch like mine, you will need two shades of green (dark and light), yellow, and red.
- Craft Glue or Glue Stick.
- Black marker (Sharpie), green marker, pink marker, and black gel pen.
- Pencil and Scissors.
- Sturdy Paper Lunch Bag.

How to make Grinch Paper Bag Puppet Craft DIY.
Step One: prepare
Start by downloading the template 👉 Grinch Puppet Template. Then trace and cut out the pieces accordingly.
- Dark Green Paper- Trace the eyebrow, nose and collar.
- Light Green Paper- trace the head, arms and the body (rectangle shape).
- Yellow Paper- trace the eye patterns and hat pompom.
- Red Paper- Hat.
Step Two: make the head and body elements.
- Trace a coin centered in the yellow eye cutout to make the eyeball. Then color the eyeball dark green (or you can trace two darker circles from darker green and glue those on to the eyes).
- Use your glue to attach the eyebrow and the eye cutouts near the top side of the head cutout.
- Use a black gel pen to trace the outlines of the eyes.
- Next, attach the nose below the eyes. .
- Draw the mouth using the black gel pen or marker.
- Use a pink marker to draw blush spots on both cheeks.
- For the body, attach the collar fur on either narrow side of the body cutout. Then attach the arm cutouts on both sides of the body pattern.
Step Three: attach the elements to the bag.
- The bottom side of the bag will be the top side of the Grinch puppet.
- Attach the body pattern on the front side of the paper bag, keeping the collar fur towards the bottom side of the bag.
- Next, draw the needle to the back side of the small cut out, slightly near the center of it.
- Lastly, flatten the bottom of the paper bag with the front side (body) of the bag. Attach the head pattern of the Grinch on the bottom side to complete the paper bag puppet.
Expert Tip👉 Refer my images as needed while making this craft.
👇👇Related Ideas.👇👇
Table of contents for this project.
Grinch Paper Bag Puppet Craft DIY, a simple Christmas holiday craft idea for most ages. Dollar Store Materials.

Grinch Paper Bag Puppet Craft DIY
Materials
- Construction Paper. To make a Grinch like mine, you will need two shades of green (dark and light), yellow, and red.
- Craft Glue or Glue Stick.
- Black marker (Sharpie), green marker, pink marker, and black gel pen.
- Pencil and Scissors.
- Sturdy Paper Lunch Bag.
Instructions
- Download the template. Trace and cut out the elements. Dark Green Paper- Trace the eyebrow, nose and collar.Light Green Paper- trace the head, arms and the body (rectangle shape).Yellow Paper- trace the eye patterns and hat pompom.Red Paper- Hat.
- Trace a coin centered in the yellow eye cutout to make the eyeball. Then color the eyeball dark green (or you can trace two darker circles from darker green and glue those on to the eyes).
- Use your glue to attach the eyebrow and the eye cutouts near the top side of the head cutout.Use a black gel pen to trace the outlines of the eyes.Next, attach the nose below the eyes. .
- Draw the mouth using the black gel pen or marker.Use a pink marker to draw blush spots on both cheeks
- .For the body, attach the collar fur on either narrow side of the body cutout. Then attach the arm cutouts on both sides of the body pattern.


