
This Easy Fall Gnome Door Hanger DIY, a simple and adorable 20 minute craft project that is suitable for most ages.
I like that this simple craft project can be made with dollar store or inexpensive materials.

Gnome Door Hanger for fall.
This is a simple project that celebrates the fall season with colorful seasonal leaves flowers.
It takes less than a half hour to make this project using simple inexpensive materials and glue.
Did you see my Easy Gnome Clay Pot DIY?
That gnome craft takes a simple terracotta pot and turns it into a cute gnome that can hold items such as coffee pods or even an actual plant. Both this gnome door hanger and that gnome clay pot are quick and inexpensive craft ideas that feature gnomes.
My gnome is actually made over a halloween witch hat. You can find similar halloween witch hats here.

Tips for making a gnome hanging.
Most of the materials used to make this door hanger can be found at a local dollar store or big box store. If you are short on time however, you may just want to hit a craft store where they are more likely to have what you need.
More tips for you
- This project is suitable for most ages. However, there are some folks who may need help with cutting and glueing in this project.
- My gnome was made using a hot glue gun to glue on the elements. An (safer for kids) alternative to a hot glue gun is to use regular glue or tacky glue and then waiting for the glue to dry.
- This gnome is best suiting for hanging in areas that are indoors or away from the elements of weather. If you plan on hanging your gnome where it can be affected by the weather, you may want to spray it with a craft sealer or place a see-through bag over it.
How to make a gnome even better.
This homemade craft idea is simple and cute just the way it is.
You can however make this even better.
Try one of these ideas.
- Instead of using burlap to cover the hat, use another fabric or an old blanket or tee shirt.
- Make your gnome into a girl by adding yarn for the hair and a craft bow.
- Turn your gnome into a wreath. Simply attach it to a craft wreath.


How to display a fall gnome door hanger.
This gnome goes is to hang and can even be hung using a thumbtack.
You can alternatively attach a yarn or string loop on the backside and use a hanger to hang the gnome on your wall.
Subscribe to DIYandFun
Here are some ideas for hanging this gnome door hanger.
- Hang your gnome on a bedroom or office wall or door.
- Display your gnome in a window for the neighbors to enjoy.
- Give your gnome to a friend or family member to enjoy.

Materials needed to make a Fall Gnome Wreath .
- A triangular cardboard Witch Hat (such as mine) or a large piece of sturdy cardboard that can be cut to a similar shape.
- Craft Burlap
- Fall Berry Picks.Smaller ones worked best for my witch hats' size.
- Orange craft mum flower
- Fall leaves for crafts. Use the autumn colors of your choice.
- Zip ties. Most sizes should work.
- You will also need a glue gun and sticks.
- Ping Pong Ball or large pom pom

How to make Easy Fall Gnome Door Hanger DIY
Step One: prepare
- If you are using a witches hat like mine as the base of your gnome, remove the lettering and decorations.
- To make a large triangle out of cardboard, use a large ruler or straightedge object to trace a large triangle that is shaped like the letter "A". Then carefully cut the triangle out.
- Remove the other materials from packaging.
Step Two: Attach the burlap to make the hat.
- To make the hat on the gnome, start by laying the front of the gnome down on top of the burlap so that the bottom third of the triangle is not covered as this will be the face.
- Trim the burlap as needed and then glue it in place leaving a few inches the bottom unglued.
- Turn the gnome over and make sure that the glue is holding the burlap in place as needed.
Step Three: Attach the remaining elements to the gnome.
- Lay out the flowers and lay them out how you would like them to be displayed. Then attach the flowers using the zip ties or glue if needed (for cardboard triangles). My hat was folded up at the bottom to hold the flowers.
- For the beard, carefully glue the beard in place, stuffing them under the bottom of the burlap to make them look like hair and a beard.
- Lastly, glue the ping pong ball or pom pom in place to create nose.
- Spring Craft Ideas
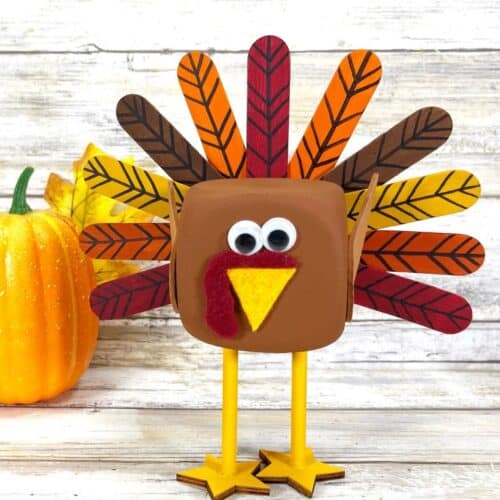
- Foam Square Turkey Craft DIY25 Minutes
- Clay Pot Acorn Craft DIY25 Minutes
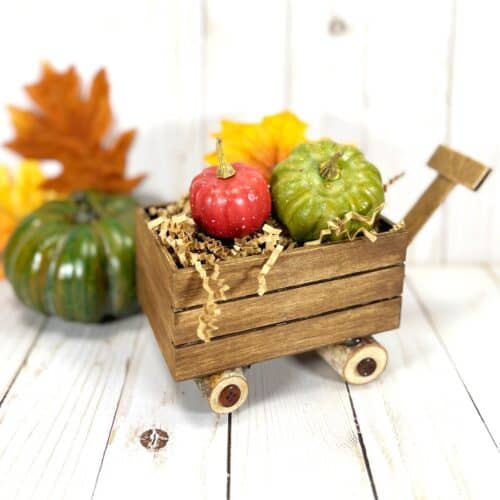
- Fall Wagon Craft DIY25 Minutes


In case you missed something.
Easy Fall Gnome Door Hanger DIY, a simple and adorable 20 minute craft project for most ages that can be made with dollar store materials.


Easy Fall Gnome Door Hanger DIY
Materials
- Witch Hat or Cardboard
- Fall Berry Picks
- Fall Leaves for Crafts
- Zip Ties
- Burlap
- Orange Mum Flower
- Ping Pong Ball or Pom Pom
Instructions
- To make a large triangle out of cardboard, use a large ruler or straightedge object to trace a large triangle that is shaped like the letter "A". Then carefully cut the triangle out.
- To make the hat on the gnome, start by laying the front of the gnome down on top of the burlap so that the bottom third of the triangle is not covered as this will be the face. Trim the burlap as needed and then glue it in place leaving a few inches the bottom unglued.
- Turn the gnome over and make sure that the glue is holding the burlap in place as needed.
- Lay out the flowers and lay them out how you would like them to be displayed. Then attach the flowers using the zip ties or glue if needed (for cardboard triangles).
- For the beard, carefully glue the beard in place, stuffing them under the bottom of the burlap to make them look like hair and a beard.
- Lastly, glue the ping pong ball or pom pom in place to create nose.